After painting the steps
I couldn't get the idea of painting the door out of my mind. I started
out by working some Photoshop magic to get an idea of what color family I
wanted to go with.
This ended up not helping me that much, because I liked all of them. Eventually, through talking it over with David and some friends, I narrowed it down to either yellow or blue.
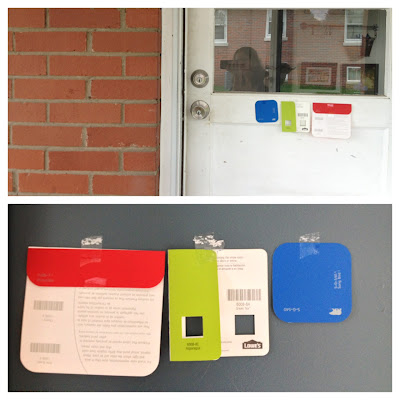
Well, that went out the window when I got to the store and started looking at colors. These are all the ones I brought home. This is when I realized (along with Cait's prodding) I wanted to paint the front door yellow. I've always enjoyed the red that it was, but didn't enjoy the fact that it blended into our red brick. Not wanting to have the front and side doors the same color, I decided a shade of blue would be my choice for the carport. However, the kitchen (into which the side door opens) is also blue and I wanted something that would pop both inside and out. I eventually narrowed things down to three colors.
After agonizing over my choice for days (seriously, days) I decided on the green in the middle. I grabbed it at the store on a whim, not thinking I would even like it. It took a little cajoling, but David also agreed to the color as well.
I chose it because it looked good with both the brick outside, and the kitchen wall color. The red looked good inside, but blended into the brick too much. The blue looked great outside, but clashed with the different shade of blue inside.
Before I could get to painting, I had some prep work to do. The front door has a glass panel in it that is a huge source of air leakage. It actually whistles on windy days.
So I took a tube of clear silicone and caulked around the edges on both sides of the door. It hasn't been windy enough yet for me to tell, but I am hopeful this will make a big difference. I also wiped down both doors, spackled any nail holes, or chipped areas and removed the knobs.
Since I would be painting yellow over red, I also applied a coat of primer on the front door. I realize now, I should have applied two, because two coats of paint later, the door still looked like this.
In the end, it took 8 coats of yellow in addition to the primer to get full coverage. The side door took only 3 coats with no primer, since I was starting out with a white door.
While I was at it, I (or, more specifically, Cait) also put a fresh coat of white on the back, since it was looked quite dingy.
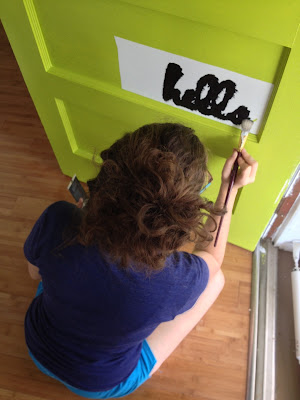
Before I declared myself finished, I had one more little project. I wanted to add a stencil to the carport door to greet visitors. I started out by applying contact paper to the door, then printing out what I wanted to stencil onto regular paper. I taped it to the door over the contact paper.
Then I used my exacto knife to cut out the letters, making sure to use enough pressure to go through both layers.
Then I used the exactly knife to help me peel up the cut out section. It doesn't always peel up easily, so some additional cutting is needed.
I carefully applied my paint. I used acrylic artist paint because I was too lazy to go into the basement to get my black exterior paint.
While it's still wet, peel up the contact paper. You'll want to remove the insides of any letters first (like the inside of the E) so there is less chance of smearing. Use your exacto knife to peel up the edges.
Then it was just a matter of letting everything dry. I left the doors open for as long as I could (until I went to bed) so there was less chance of anything sticking.
Much happier looking!
I painted the edge of both doors as well, so even if they're not fully open, there is still a fun slice of color.
The back of the door looks much brighter and cleaner now.
From both the living room and the kitchen, the door fits in and really livens up the house. And I just realized that the door color matches the picture in my largest frame.
The front door is looking equally cheery.
There is no longer any issue with it blending into the brick, either!
Though it may not look like it, even Chubby approves of the color.


