I had mentioned before that we planned to refinish the bathtub down the line. I knew this would put our one and only shower out of commission for a while, so it needed to be timed just right. I figured with a three day weekend coming up, it would be the opportune time to get 'er done.
Our tub was quite gross looking. The bottom had almost no finish left, and thus, grime accumulated and Would. Not. Come. Up. If there is a cleaning product, homemade or store bought, I have probably tried it with no success.
I had originally planned to use Rustolem's Tub & Tile Refinishing Kit because it was only $25 and I had read many reviews and blog posts from people who had used it. However, when I went to Home Depot to purchase it, I discovered it was an oline only product. I had to have it within a day in order to finish up over the weekend. So I went to Lowe's instead and spent $10 more on the Homax Tough As Tile Refinishing Kit. I couldn't find a lot of others' experiences with it, but I read reviews on Lowes.com, which were ripe with helpful tips.
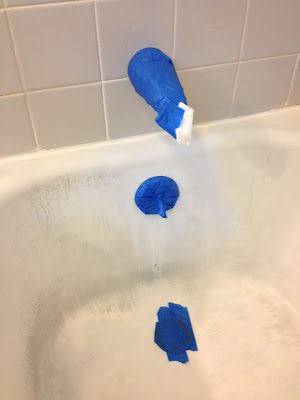
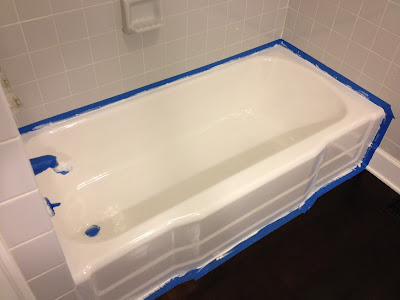
I followed the prep instructions to a T. I scrubbed the tub with the included cleaner, rinsed, dried, scoured with steel wool, then rinsed again. I did this three times and my arms were quite tired. Then I dried everything very thoroughly and taped off anything that I didn't want to paint.
I also stuffed a paper towel into the faucet to prevent drips. Once I was sure everything was 100% dry, I got started painting.
I got the brush on version (there's also a spray on version) because I didn't want to fool with covering every surface in the room to protect it from overspray. I made sure to start at the point furthest from me and work my way forward so I wouldn't be leaning over wet areas. I also put my hair in a pony tail because I shed like crazy and I didn't want a stray hair ruining my finish. I used brand new brush because I didn't want any old paint residue getting in the way.
It needs to be applied super thin. It is a self-leveling product, so the brush strokes will start to fade as it sits.
It is quite fumey, but not as eye-burning, nose bleed-inducingly strong as I expected. I worked as quickly as I could because it begins to dry pretty quickly.
Once the first coat was on, I shut the door to the bathroom and left the exhaust fan on for 2 hours. I was tempted to open the windows in the house, but the instructions say to keep the temperature at 72 degrees with less than 80% humidity. The day I chose to do this, it happened to be in the 90s and extremely humid, so I kept the windows shut. I did leave the temperature in the house at its usual 74-80 degrees during the entire curing process and it doesn't seem to have hurt anything.
The second coat has to be applied after 2 hours, but sooner than 4 hours (otherwise it has to cure for a full 72 hours before reapplying). I brushed on the second coat in the same way as the first, then cleaned everything up (leaving on the painter's tape, as the directions say), then shut the door with the exhaust fan on and left it alone for a full 72 hours. I also turned off the water supply to the tub because David realized we can do that now that we have a PEX water line system. We're so fancy!

Is the finish perfect? No. If you sit there and stare at it, there is some texture that the brush strokes left behind, and there are some thin spots that I would touch up if it didn't mean going another 3 days without a shower. I don't think it's realistic to expect a $36 kit to look as good a professional re-glazing that costs 10 times* as much. But am I happy with it? Absolutely. What was once a dull, dirty tub is now bright white and super shiny. And I know no one that comes into my bathroom is going to spend more than a half second contemplating my tub, so to them, the finish is going to look perfect.
*I totally pulled that number out of the air. I have no idea how much a professional re-glazing costs, other than "More than I want to spend if I don't have to."


