Wednesday, November 13, 2013
Replacing the Garage Door Part 1
Our old garage walk-through door was in some major need of replacing. It was literally falling apart. Someone could have looked at it too hard and it would have fallen off the hinges.
The frame wasn't in great shape either and had started to rot at the bottom. It had also been home made by the previous owners and wasn't exactly easy on the eyes.
My mother wound up with an old exterior door when she replaced hers that was still in good shape, so we took it off her hands and got to work.
We had a couple of fun surprises: this is what the inside of the old door looked like.
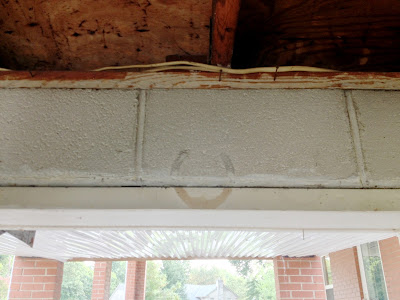
When we removed the old trim, we discovered that a horseshoe used to be above the door.
The first step, after taking the old door off the hinges, is to remove the old frame. David did this using a pry bar to loosen things, then running a reciprocating saw down the space between the door frame and the cinder blocks to cut through all the nails and screws holding it in place.
Then he used a hammer to free it from the opening.
We purchased an exterior door frame kit from Lowe's that includes weather stripping, but it ended up being a bit too small for our opening.
We fixed that problem with some 6" wide decking boards. David cut them to fit the opening on each side. We ended up not using the top board because it made the opening little too short for the frame to fit so ignore that piece.
Then we tested the fit of the frame again and it was just right.
He attached the decking boards to the cinder block using toggle bolts and taking advantage of the naturally occurring holes in the block.
David marked and attached the door hinges we bought to the door itself according to the package's directions. We needed to carve out notches in the door frame to accommodate the hinges next (pre-hung doors will already have all this done).
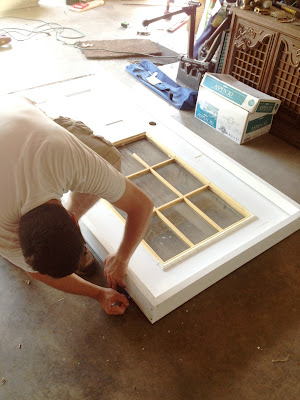
David removed the frame and laid it down on the floor, then set the door inside of it, as though it were closed. He then marked the location of the hinges on the door frame so he would know exactly where to carve out notches so that they would match up properly when the door was hung.
Because the door is steel, we weren't able to carve out notches on the door itself like you normally would want to. Instead, he used a chisel and mallet to make the notch twice as deep so that when the door is shut, it still sits flush with the frame.
Once we got the door hung, it actually set rather well in the frame, so there wasn't any shimming necessary. I painted the door with the same yellow paint that's on the front door, since you cane see both from the road and it helps to tie in our detached garage to the house.
Then we attached some oil rubbed bronze hardware to complement the black window frames on the door.
We still have some finishing touches to put on the door in the way of trim, but the weather has suddenly turned very cold, so we will have to wait for a warmer day to finish this project up. I'll be back with another post when that happens!
Subscribe to:
Comments (Atom)


