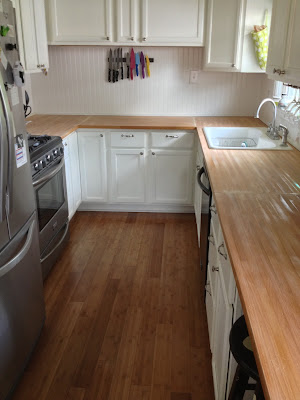
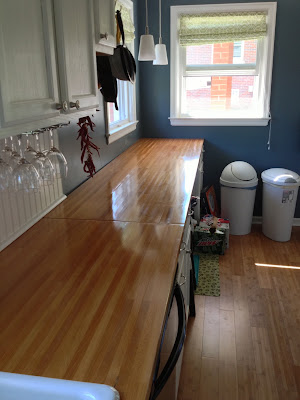
In October of 2011, we upgraded our countertops from standard straight-off-the-shelf-at-Lowe's laminate to butcher block. We went with the Lagan series from Ikea, which, tragically, they don't carry anymore. We chose butcher block because it was very affordable (doing the entire kitchen was under $200), we liked the way it looked and felt it complemented our style well.
When we initially installed them, we experimented with a couple different products for sealing and protecting the wood. We first tried Ikea's Behandla polish. It wasn't really giving us the sheen that we wanted, so we next tried Tung Oil. It was a little better, but still not what we were looking for. After doing some research, we decided to try Waterlox. It seemed to get some great recommendations, and even though it was pricey ($26 for a quart) we decided it was worth it if it made our new counters last for the long haul.
Let me tell you, this stuff was amazing. We applied it with a brush and it went on super smooth and shiny. In all, we applied 7 coats. We applied it only to the tops and sides of the counters because the bottoms all had several coats of Behandla and Tung Oil and we figured that would be sufficient because they wouldn't be seeing any "action."
Two years later and our counters were starting to look just a bit worn and had a few scratches in them. After seeing some beautiful inspiration on Pinterest like this and this, I decided I wanted to sand down the counters and stain them a beautiful dark brown.
I got all gung-ho (as I do) and went out to buy some stain, and came home and whipped out my sander to attack the counters immediately. Fortunately, someone was able to talk some sense into me, so I first got the piece that was cut out for the sink during installation. It had the exact amount of sealer on it as the rest of counter, so I would be able to judge exactly how the new stain would look, without doing any damage to the current counters.
I gave it a good through sanding with the orbital sander, then applied a coat of stain, let it soak in a few minutes, then wiped it off.
BIG FAIL. The wood barely soaked up the stain at all. After a period of great puzzlement (longer than I care to admit) David innocently asked, "You did stir the stain, didn't you?" Ummm, no. In my haste to get started, I had completely skipped this step.
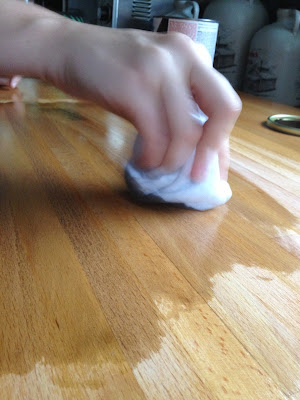
What a difference that made going on! I got really excited... until I wiped off the excess (that's the bottom part of the picture). Back to no difference at all and another crushing blow to my excitement. We got pretty dejected at this point, and, despite trying a few different things, nothing seemed to make the stain soak in any better.
A few days passed, and David decided he was going to show that wood who's boss. He sanded the crap out of it. He literally sanded the 2 square foot area for about 10 minutes.
And I about cried because it was so beautiful and exactly what I wanted. However, I knew that spending 3 solid days sanding the countertops was not something I was willing to do. And so, I sadly said goodbye to my dreams of having dark wood counters.
After a period of grieving, I revisited the project, simply to refinish them the way they were. I started by clearing everything off the counters.
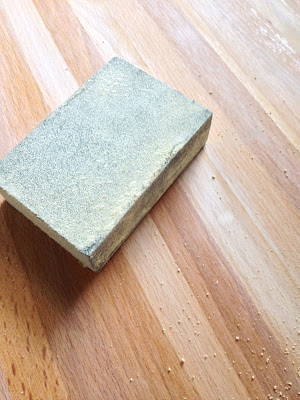
Then, I went over the whole thing with the orbital sander and a medium grit sandpaper. Then went over them again with a fine grit sanding sponge, making sure to get the edges and corners that the power sander couldn't reach.
I wasn't aiming to remove all the layers of finish as I was when trying to stain the wood, I just wanted to smooth everything out and remove any scratches or stains.
After that, wipe everything down REALLY WELL. I used a damp paper towel, followed by a dry paper towel, followed by my bare hand. If any dust is left behind, it will get in the finish and pretty much ruin your life.
Then I busted out my Waterlox and brush. I used the same medium sheen as before. This is actually the same bottle, it lasts forever.
I poured a little directly on the wood, then used the brush to spread it around. This is the same method I used when initially applying it. You can see in the top of the above picture where it's already nicely spread.
There were a few spots that got a heavier sanding (like where there was a scratch) that absorbed the Waterlox more, and thus, were not as shiny. You can see one right in the center of the above picture, where the light is reflecting from the window. When I saw these, I knew I would need to apply a second coat. I left them to dry for 6 hours (which I later learned was supposed to be 24, whoops) before applying a second coat. I had all the windows open to help everything dry and cut down on fumes.
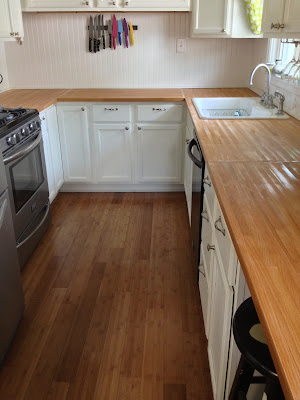
After two coats, I gave it a light sanding with the fine grit sanding sponge, then wiped them down with a damp paper towel to remove the dust. Everything was looking shiny and new again. I reapplied some clear silicone to the joints where 2 pieces of wood meet, as well as around the sink.
I was comfortable setting things on the counter after 24 hours (like a plate while I made a sandwich) but I waited 48 hours before moving anything back onto the counters that would be sitting there long term (like the KitchenAid mixer).
Overall, this was a very quick project (once I realized staining was not happening). Not including drying time, it took about 2 hours of actual work, from clearing the counters to applying the silicone.
So there you have it, my heart wrenching tale of refinishing counters. We have big dreams of one day closing in the carport to make it a larger kitchen, so maybe one day my dreams of dark wood counters will be realized.






Whoa! What a fantastic project! Your wooden counters created a good impression of a simple and happy home. If you're dreaming of having a bigger kitchen in the future, there’s nothing wrong if you go for another material, like granite or marble countertops.
ReplyDeleteMartin @GraniteBusters.com