Sunday, May 18, 2014

Painting Patio Chairs


These patio chairs have been in our lives for about five years now, and while they're still very sturdy, they were starting to show some definite signs of wear. The fabric was getting very faded and some rust was starting to appear on the frames.

When I saw a pin on Pinterest about spray painting patio furniture, I decided to give it a go. I didn't use the same spray paint as in the tutorial, because the color choices were limited to white, black, or metallic. I wanted something a little more bold, so instead I picked up some Valspar Outdoor spray paint in a nice aqua color.


I prepped the chairs by giving them a quick wipe down to get all the grass, etc. off of them and then got started spraying.


You want to aim for nice, thin coats done a few minutes apart. This will keep you from running into the dreaded drip. I started out with just one can on one chair to make sure this project wouldn't be a big old fail. When everything seemed to turn out alright, I went out and got three more cans for the other three chairs and finished up.


One can of spray paint ended up being the perfect amount for each chair, but if you have bigger chairs with more surface area, you'll need to get more.


After all my surfaces were well covered, I left them in the garage to dry for a few days before moving them outside.


So far, they've only been outside for a couple days, but if anything catastrophic happens, I'll definitely update.


The finish is nice and smooth, even on the fabric, and there hasn't bee any problem with cracking paint so far. I'm calling this one a success!

Wednesday, May 14, 2014

Sprucing Up the Mailbox

My mom called me the other day and said, "I'm bringing you some bushes. They require full sun." Full sun is pretty hard to come by at my house thanks to the giant maple tree in the front yard. I was discussing where to put these plants with David, who suggested we plant them around the mailbox. This has always been an annoying spot to mow and we've talked about creating a flower bed there before. So it was decided.

Since that day, however, it has rained on every single one of my days off work. When I woke up this morning and saw that it was still sunny despite the forecast of rain for the next three days, I decided to race the clouds and see how far I could get on the project.

I wanted to make a border around the bed in the same style as the one at the front of the house that I put in last year.


The first thing I needed to do was figure out how many paver blocks I would need. I devised a highly scientific method to determine this. I put one foot on our current paver border and counted that one "foot length" was about three paver blocks. Then I counted out how many foot lengths my new border would be and multiplied by three. This came out to 38 blocks and so I planned to get 40 to be on the safe side.


Here's where we started. So glamourous. I started out by moving the flower pot and mowing the area I would be making into the flower bed.


Looking much better already. Then, it was trench digging time. From here on out, I'm going to be pretty brief in explaining what I did. For more detailed instructions, you can see my post from last year's border installation 
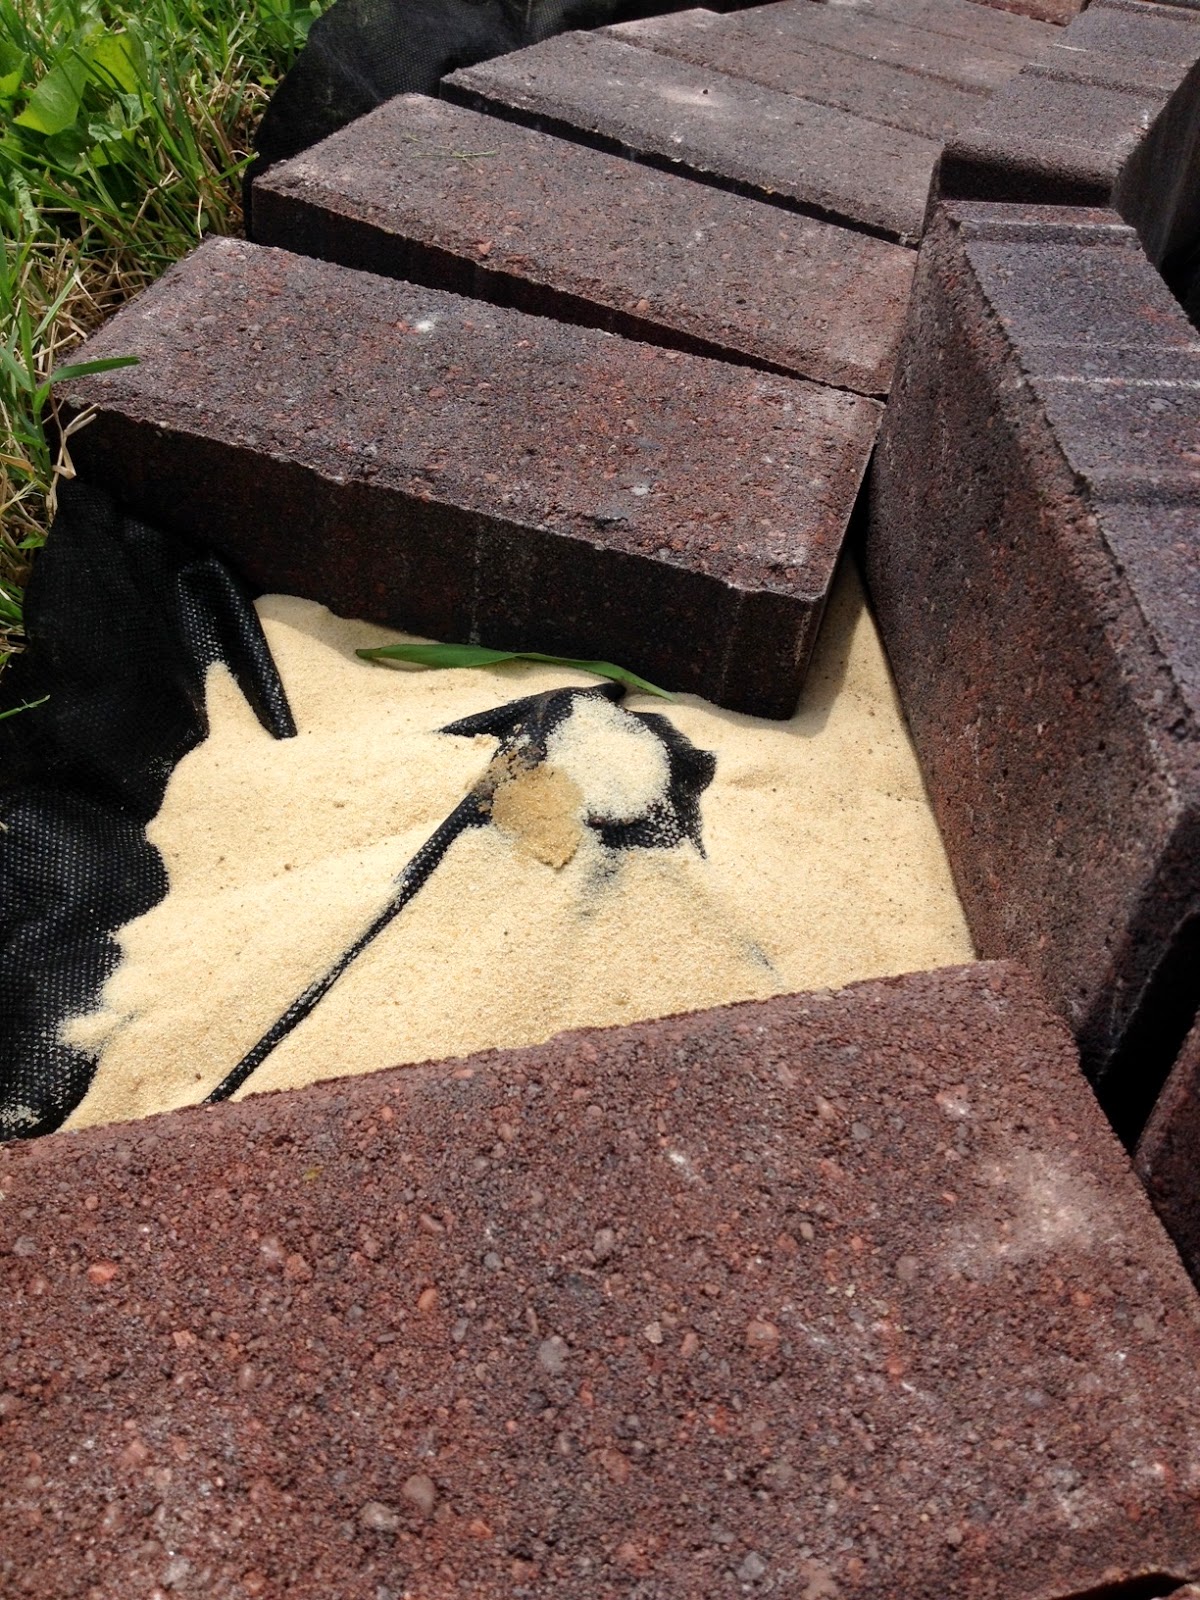
here. This is by far the most labor intensive portion of this project. I used a spade to create a line where I wanted to edge of my border to be. The I laid down some pavers to see how wide my trench needed to be.


Marked in yellow is the first side where I dug. Then, I did the same thing on the other side, making sure to get all the way under the grass I would removing as much as possible. This ensures the grass pulls up in nice big strips. Honestly, if I were less lazy I would have removed all the grass in the bed area, but oh well.


Then, I had to go inside and eat lunch because I felt very light headed.


After refuelling, I laid down my landscape fabric and filled the trench with sand for levelling the pavers.


Then put down my blocks. My highly scientific foot length method turned out to be extremely accurate, as I ended up using 39 blocks.


I did run into a small issue. There was a weird metal pipe that I unearthed when I removed the grass. It sticks up too far into my trench to lay a block over it, so I will have to have David go back in with a reciprocating saw to cut it off at ground level.

After I got all my blocks in place, I cut some holes in the landscape fabric and planted my bushes, then added some mulch.


As you can see by this picture, I managed to finish just as the clouds were rolling in. My little plants should eventually grow to be 2 or 3 feet in diameter, so they will fill in the space nicely. This border took me about 2 hours to complete and less then $30 in supplies. And now it will be much easier to mow around the mailbox. Win-win!

At the front of the house, I had filled in the gaps between bricks with play sand. That ended up washing out pretty quickly, and this year, I'm starting to see some weeds grow up into the gaps. So I do plan on getting some polymetric sand (it turns into concrete when it gets wet) and using it on both borders. I'll update when I get that project done!


Sunday, May 11, 2014

House Progress So Far

I thought it would be fun for those of you who haven't ever actually been to my house to go on a little virtual tour, so I took advantage of the fact that my house was pretty tidy today and went around taking pictures of all the room. Well, except the guest room/junk room, because that room is relatively untouched and not photo-worthy. I'm also including pictures that were taken before moving in as a comparison point.

Living Room:


Kitchen:


Bathroom:

That gross cracked floor tile makes me cringe. (Apologies for the awful picture)


Office:


Probably the most changed room in the house. Look at all that wood panelling!


Bedroom:


Thursday, May 8, 2014

I Saw the Light!


As you can see from this lovely picture from 2011 (I forgot to take a "before" whoops!) the lighting in our kitchen is nothing spectacular. Nor did they match each other. On the other side of the kitchen is a standard "boob light." Since they were both perfectly functional lights, replacing them got put on the back burner.


My recent "update the kitchen" spree led me to look more seriously at some new options. This was another one of those projects that I didn't think would be so expensive, much like the trash cans. I found quite a few options that I really liked, but that were way out of our price range.

I wanted something that didn't have an open bottom because the kitchen is so narrow you would mostly be standing directly underneath the fixture. I found these at Home Depot pretty early on in my search, and loved them. Imagine me standing in the aisle staring at them with a huge smile on my face.


I was still determined to find something less expensive, though. So over the next few weeks, I looked at all kind of stores, online and at places like the ReStore, and came up with nothing that I liked better for a lower price. So I decided to go for it and took two of those babies home.

I'm no electrician, so I'm not going to go into details about to change a light fixture (that's 100% David's arena). So let's just get straight to the afters.


I love that the dark finish makes them stand out from the ceiling.


And now that the main fixture in the room isn't flourescent, the kitchen is so much warmer and cozier at night. I love my soft white bulbs.


What does everyone think? A definite improvement from where we started back in 2009, for sure!


Sunday, May 4, 2014

Hiding That Unsightly Trash

Our kitchen is small. There's really no two ways about.Though we have made a few improvements over the years to make it as functional as possible, one thing we have never done is find a more attractive solution for our trash and recycling.


From the beginning we have had two cheap white plastic trash cans sitting out. As you can see, we never even bothered removing the labels on them. Classy stuff. 

Recently, I decided I wanted to replace these eyesores with some stainless steel versions. When I started shopping around, I was horrified at how outrgeously expensive they were, especially for something designed to have trash thrown in it. Since we needed two, it would cost at least $80, and the ones I really had my eye on would be more in the neighborhood of $200. Needless to say, I had trouble justifying to expense to myself. 

I was standing in the trash can aisle at Meijer one day, when I started really thinking about what I wanted. I had considered a "trash can in the cabinet" system before, since we had one in the house I grew up in, but I imagined that we would be seriously sacrificing on capacity. But in that aisle, I had an epiphany. I didn't want any trash can sitting out, no matter how nice they looked. So I started researching in-cabinet cans and I came across this one from Lowes.


It got great reviews, and each trash can was actually a similar size to the stainless ones I had been looking at so we wouldn't be sacrificing size like I thought. It would also fit perfectly in the cabinet right next to our current trash cans. It was rather expensive, the cost seemed more worth it if it meant I didn't have to have them sitting out in the open anymore.


First, I emptied out the cabinet and found new homes for its former occupants. Then I just assembled and installed the sliders according to the directions. It seriously took all of 15 minutes.


Chubby approved. We lived with them like this for a few days and it quickly became apparent that I am just too lazy to go through two motions to throw away something. Opening the door and then pulling out the trash cans? No, thank you. So I went out and picked up a door mount kit.

Let me tell you, I wanted to kill people while installing this thing. It wouldn't have been near as bad had our cabinet not been right next to the wall.


I had to use an offset screwdriver to tighten all the bolts on that side and I couldn't even see the head of the screw so I had to use it by feel alone. Suuuuper annoying.

My anger came to a head when it came time to attach the door to the kit. Cait had stopped by and suggested I just completely remove the sliders from the cabinet and lay it on the floor. It went much smoother after that.


In hindsight, I probably should have done this from the beginning, but I'm stubborn.


Finally finished!


And it is sooooo wonderful to not have trash cans sitting out in the open anymore. It even makes the kitchen feel a little larger.

I have one more kitchen update that we tackled this weekend to share later on this week and I love it even more than my hidden trash!