Sunday, June 26, 2016

A Little Furniture Refresh

Both the nightstands and the dresser in our bedroom are from Ikea in the Hemnes series. I loved both of them still, but with last year's newly dark stained floors, the black dresser was blending in a bit too much. I had considered the idea of painting the dresser, but hadn't really settled on anything concrete until I came across this pin on Pinterest. I loved the two tone look, and it felt so fresh and light. I decided I would redo the nightstands to match, also. I tackled those first since they were much smaller and easier to start with.


I took them out to the garage and used the orbital sander to lightly rough up the surface over everything but the drawer front, which I sanded down to the bare wood for staining.


Once they were dusted off, I applied two coats of oil based primer to the main body of both nightstands.


Followed by three coats of semi-gloss acrylic paint.


I applied one coat of my go-to stain, Rustoleum's Kona, to the drawer fronts. After that dried, I applied one coat of semi-gloss spar-urethane to the drawer fronts and the night stands. I applied it very lightly to the painted areas because I was afraid of yellowing. Turns out I was right to be, because there are some definite yellow areas. Rats.

Before moving on to the dresser, there was a project I wanted to complete on the wall above the dresser. I had some Ikea mirrors on the wall that I had fallen out of love with, and so I took them down.


As you can see, I had applied some of them before painting the room. They were stuck on with adhesive squares, so there was some drywall damage when I pried them off the wall.


Nothing a little spackle and paint can't fix.

My plan was to do a gallery wall around the TV, which would also be mounted on the wall. Once I got Chico's pawprints framed and hung next to the newly mounted TV, I made a very detailed drawing on my phone of how I wanted the other frames to look. #sarcasm


Then, through the magic of the Internet, and a trip to Ikea, the new frames were up and ready to be filled with photos. Which also meant it was time to paint the dresser.


The process was the same as with the nightstands: two coats of oil based primer and three coats of semi-gloss white.


I painted the larger drawer fronts in the dining room, which the cats thoroughly enjoyed.


After much discussion and deliberation, I decided on staining only the four smaller drawers. Those also got one coat of Kona. This time, however, I learned from my mistake and bought a quart of water based polyurethane, which I brushed over the entire dresser with no yellowing at all. Score.


Looking pretty good, yes? Oh, but where is the hardware? I had used wood filler to cover up the screw holes on the larger drawers to make way for the new t-bar handles I had ordered from Ebay.


Ta da!


The best part is that all the hardware for the dresser and nightstands only cost me $16. Thanks, Ebay.


I'm really pleased with the end result.


And no more blending into the floor! Woo hoo!

Friday, June 24, 2016

The Time Has Come... For Staining

After two eagerly awaited months passed letting the new deck lumber air out, Memorial Day weekend arrived, and the time was nigh for staining the deck.

One small step we had to tackle first was relocating my yucca plant.


I had hoped to be able to leave it where it was, but it was growing right up against the deck and over top of it, as you can see above, so it really needed to find a new home.

Once that was completed, we headed to Lowe's and gathered our supplies: a jug of Olympic deck cleaner, a gallon of Olympic Elite Semitransparent deck stain in Wenge, a deck stain applicator, and a cheap 3" paintbrush.


First thing was cleaning the deck. This stuff worked pretty well and was quite easy to use. We used a hand-held tank sprayer to apply it and then washed it off after the recommended time. Even though the deck was only two months old, it actually got pretty dirty in that time. The above picture is post-cleaning.


Before slapping on some stain all over the deck and deciding we hated it, I grabbed a scrap piece of deck board and applied some. I let it dry for a couple of days before making a final decision on it, which was a big thumbs up.


Then it was application time, which I sadly have action no pictures of. Here's the run down though: Our stain applicator had one edge that was meant for getting into the cracks between boards, so I would fill in two rows at a time, then go over the tops of the boards. David would follow behind me with the brush getting down into any gaps or knots that the stain pad didn't cover well enough.


 The first gallon ran out with the completion of the top surface. I went out to buy a second gallon, even though I would only need a small bit of it so that we would have extra on hand for any touch ups or reapplications down the road. I used the paintbrush to get all the sides of the deck and with that, application was complete.


We had to wait 48 hours before replacing any furniture per the stain directions.


I feel like the stain makes it look much more finished, like it's always been here.


This photo is probably the most accurate representation of the actual color. A nice medium brown, so it doesn't get too hot on bare feet.


I'm so thrilled with how this project wrapped up!

Thursday, April 21, 2016

Rockin' & Rollin'

One last project we wanted to complete in our new backyard oasis (besides staining the deck when the times comes) was laying down some gravel. I had mentioned previously that we were going to do a gravel border around the deck. I wanted to do that to create a buffer zone that would make mowing much easier.

I also wanted to gravel around our fire pit which had previously been a lonely little pit all by itself in the yard. With the addition of the deck, it was much closer to the action, but I wanted to really tie it in and make it feel like part of the same space.


I started out by laying my landscape fabric in the rough shape that I wanted. Since the fabric is rectangular, and the shape I was going for was round, it was a pretty rough layout. After I got things looking generally the way I wanted, I took my edging and used the included stakes to lay it out over top the fabric. The I went around the outside of the edging and cut off the excess. I did a bit of adjusting and finagling after that until I was happy with the way it looked.

Then we were ready for gravel! We went to a couple of landscape places around town, as well as Lowes to check out their bagged gravel. I learned that gravel is quite a bit more expensive than I had anticipated.


I fell in love with the first kind we saw which was a black granite chip. It was pretty on par with most everything else that we saw, cost-wise. So we ordered 2 tons of it and had it delivered to the house.


This is what 4,000 pounds of gravel looks like. A little underwhelming right? I was afraid it wasn't going to be enough, but as we got to spreading it, it turned out we had plenty.


David shoveled it into a wheelbarrow and dumped it out on the landscape fabric while I used a garden rake to spread it around. It took only about an hour before we were done.


I'm very pleased with it. And yes, we do need to mow the grass pretty badly.


And the border helps to hide any unevenness of our skirt boards, which is an added bonus.


I can't wait to make some s'mores out here.


With the extra we had, we filled in around our paver walkway. Despite a few seasons of attempted moss growing, the results were pretty lackluster. We didn't want to kill what was still there, so we just filled in gravel around it.


And with that, out backyard oasis is complete! It's been such a huge change in just about one month. We spend so much more time out here than we did last summer, and I am thrilled with how its all turned out.

Wednesday, April 13, 2016

And Then There Was Light!

Can I just say how much we have been loving our deck? It has been unseasonably cold and seasonably rainy so we have only been able to hang out on it a few times, but you better believe we have eaten dinner out there every day we could.

One thing it was lacking, however, was light, which made it difficult to enjoy once the sun went down. Over the winter, I saw some string lights at Costco that I fell in love with. They had large standard looking light bulbs that hung down and were generally awesome looking. I told David that when we built our deck (which at the time was still a "some day" project) I wanted to get them. And so now that we have our deck, that's just what we did.


As for how we installed them, I looked at a few tutorials on Pinterest and decided upon this one. I liked it because it is easily removable unlike some others I had seen that involved setting conduit or posts in concrete. We followed their directions to a T, with one addition.


We added a pipe strap further up the conduit for added stability. We were especially concerned about that particular factor because our string lights were of the heavy-duty commercial variety, and thus quite a bit heavier than most lights.


We used three poles on the yard side. On the house side, we attached metal hooks to the board that runs along the house right under the soffit. I'm sure it has a name, I'm just not sure what it is. We pre-drilled a hole to get through the metal that covered the wood, and then just hand screwed the hook in place.


I eagerly awaited nightfall all day long. And I was not disappointed.


You'll notice we also added some rope light. We ordered it from Amazon and attached it under the 1" overhang of the deck with the clips it came with. It's as much safety as it is for ambiance, since we didn't want anyone falling off the edge of the deck or missing the step down.


I'm so thrilled with how it turned out, and can't wait to enjoy many warm evenings under these lights!

Friday, April 1, 2016

I've Got the Blues

One quick change before I get into the cabinet talk. The dining room was still sporting its ceiling fan over the dining table from its former days as a living room. While having a fan in the living room was nice, having it over a dining table was a little less nice. So when I saw someone on Facebook selling a light fixture that I immediately fell in love with, I didn't hesitate to get all over that.


I scored this like new beauty for only $60. We changed it over to a dimmer switch and it makes the dining room 1000% more cozy in the evenings. Love it.

Now on to the cabinets. I had made my poorly photoshopped rendering, which I loved. I wanted to make sure I loved in real life, too. So I removed all the bottom cabinet doors, took them out to garage, where I had created a make-shift spray booth, and sprayed on one coat of paint. After it had dried, I brought a couple doors in to see how they looked.


And well... I was unsure. It was very dark. I considered abandoning ship or trying a different color. I already had this color on hand (it's the same as the accent wall in the dining room and the stairwell) and I was really wanting to keep this project nice and free. So I left the doors sitting there for a day while I weighed my options. I finally decided that I would forge ahead and really hoped that I wouldn't regret it.


I alternating spraying the doors out in the garage and painting the cabinets themselves with a brush inside. This is coat #1 inside.


Followed by coat #2.


It took three coats in all to get even coverage. I left all the drawers and doors open for a couple of days to make sure there would be no stickage. It was quite a pain in the butt to cook around the doors in the already small kitchen, let me tell you.


I waited to paint the toe kick last because I knew it would be annoying and I didn't want to worry about touching wet paint on the cabinets while I was rolling around on the floor. But then the whole deck thing happened, so it stayed looking this way for a few weeks.


So after the deck was completed, and I was going through project withdrawal, I whipped out my painters tape, taped off the floor and got 'er done.


I'm actually pretty happy with it and don't feel like it's too dark at all so I'm glad I forged on in the face of doubt. It did create another project for me, however. The wall color and the bottom cabinet color don't even remotely go together. So I will eventually be painting the walls. I'm thinking a really pale grey.

I'm still thinking about removed those upper cabinets and tiling the backsplash, too, so you know I will let everyone know if/when that gets done!

Thursday, March 31, 2016

Yeah, So We Built A Deck

At the end of my last post, I had talked about some ideas I had for the kitchen. Those upper cabinets I talked about moving are still firmly in place, but my bottom cabinets are a very different color. That's another post for another day, though, because that project got usurped by another much more exciting project and so isn't 100% complete just yet.

In case the title of this post wasn't a big enough hint, that more exciting project was building a deck. While we were discussing what we wanted our next undertaking to be, David suggested a deck in the backyard. This is something we have wanted to do for years, so I didn't hesitate to say "UM YES LET'S DO IT RIGHT NOW, I'LL PUT MY SHOES ON LET'S GO TO LOWE'S." I tend to get excited about starting things.


Now, since neither of us has ever built a deck before, we started out by watching lots of YouTube videos and reading lots of tutorials. When we felt we had a pretty good grasp of the process, we started sketching out our ideas. We started out pretty complicated, with multiple levels and non-square shapes. Then we realized we were complete novices and really just needed to chill out and keep things simple. Thus, we landed on the simple rectangular deck that you see at the top part of the drawing, knowing if we wanted to add on down the road, we could.


With our layout decided, we took things outside. We used stakes and string and a string level to determine how much of a slope the yard was at and how high our deck would need to be at the low point. We also used the stakes to mark where our support posts needed to go.


We cut down 4' sonotubes into 16" sections.


Then dug holes in the ground at the marked locations and stuck those bad boys down in the ground. We wound up with 10 posts total, 5 on each long side of the deck.


Then we filled each one with concrete and stuck in the post bracket. We used the string and posts to make sure all the brackets were in line with each other.


After the concrete had dried for 24 hours, we started setting the posts and attaching the outside supports, for which we used 2x8s. The deck is 12' wide by 24' feet long which makes things much easier for us since boards come in 12' lengths. Hooray minimal cutting!


This was a pretty tedious process, since we had to make sure everything was level and square.


Once everything was attached, our low end of the deck ended up being quite a bit higher than we had anticipated, 20" off the ground. We had not included a step in our original plan, but at that point, we knew we would need one.


After that, we laid down landscape fabric to prevent weeds and grass from growing underneath. We extended it out past the outside of the deck because we plan to do a gravel border.


Then it was joist hanging time! We had to add a few extra joists to accommodate the decking pattern we had chosen, which was a "picture frame border" and then laying boards long ways with a "zipper seam" in the middle.


Chico was very helpful throughout this step.


After all the joists were attached and levelled, we added in the supports for the step.


What a fine looking step. At this point, we started laying down deck boards like no one's business. We only attached them to three joists at first just to get everything in place.


We ended up needing to shave 1/2" off the last row. We actually opted to take it off the second to last row, so that the mitered corners of our picture frame border didn't get thrown off. You can see what the zipper seam looks like here, too.


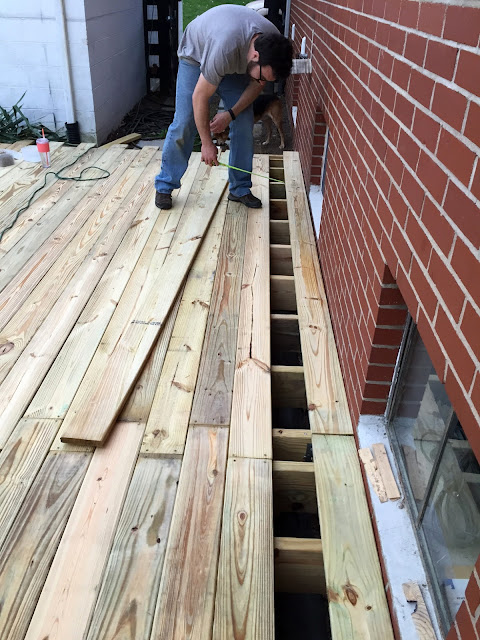
When everything was in place, we used the circular saw to cut off the ends of the boards flush with one another. We just made sure to set the blade depth so that it would cut through the deck boards, but not into the underlying structure.


Doing it this way is much faster than cutting each board as its laid down. After that, we attached all the skirt pieces to the deck so no creatures can get underneath and make it their home.


For the final step, we had some wonderful friends come over with their drills and we went nuts screwing in all the boards.  We snapped chalk lines down each joist,  then two people went down each line hammering in the screws to get them started, while two others followed behind with a drill screwing them all the way in.


It made what would had been a tedious, days long step go so much faster!


And with that, we were done! Everything got finished after dark, so I have no photos of the empty finished deck. We immediately moved everything up and hung out for a while. The entire process took about 3 weeks, with only working for a couple hours some evenings and when we had free time on the weekends.


I have some very exciting plans for incorporating the fire pit and decorating everything.


We have to wait a couple months for the treated lumber to dry out before we can stain and seal the wood, which is a bit of a bummer because I'm really looking forward to staining this baby a nice deep brown.


I think the thing I'm most excited about is not having to move all the patio furniture every single time I mow. Woo hoo!!