Thursday, April 25, 2013

Guest Room Completion!

Clearly, I was being a bit too optimistic thinking I could wrap things up on Sunday. I applied the first coat of mud around 10 that morning, and by 10 that night, it still wasn't dry. Sad face. So I had to put things off until mid-week, when I was able to apply my second and third coats.

Don't think for a second you won't get dust EVERYWHERE.

David and I learned through trial and error, as well the advice of people who know what they're doing that the pre-mixed drywall mud = no bueno. The bagged powder is less convenient, but it is about 1,000 times easier to work with.


My mixing method consists or dumping some of the powder into a drywalling tray, and adding in some water. I mix it up, and add more water as needed. If I make it too runny, I add more powder. There's probably a better way to do this, but I found this works well for me, and after a few attempts, you get a good idea of how much water is needed. It should be nice and smooth without any clumps, but not so runny it won't stay on a trowel. A sour cream-like consistency, if you will.


Applying drywall mud is really something you just have to do and be really bad at until you get the hang of it. I still wouldn't say I'm good, but I get passable results.


I usually fill in the screw holes first, since they're easy. Then I move on to the seams. You want to lay it on thick, then apply the tape over it. We've found that the paper tape is easier to work with, rather than the mesh. If you don't apply enough mud underneath, the tape won't stick properly and will be obvious on the finished wall. Use the trowel to smooth everything out, then apply another layer, making sure to feather out the edges as much as possible. After it dries, give it a good sanding, then apply the second coat, going out slightly wider than the first, then repeat for the third coat.


After everything is dry and the final sanding is done, use a rag to dust off the wall a bit. I like to take this time to really feel up the wall to make sure there aren't any bumps or unevenness. Once you're satisfied, it's priming time!


I didn't really understand the purpose of this product, until I used it. Bare drywall is like a sponge. When painting a 10'x10' room with this stuff, it used every bit of a gallon for one coat. A room that size with pre-painted walls would normally use closer to a half gallon for two coats. So instead of wasting good paint , you go over the drywall with the primer.


One coat is sufficient, and the coverage doesn't have to be perfect. Once the primer has dried, we painted the wall to match the rest of the room, replaced the trim with the same pieces that had been removed, caulked the seams and that was that. Chico was extremely helpful during the entire process.


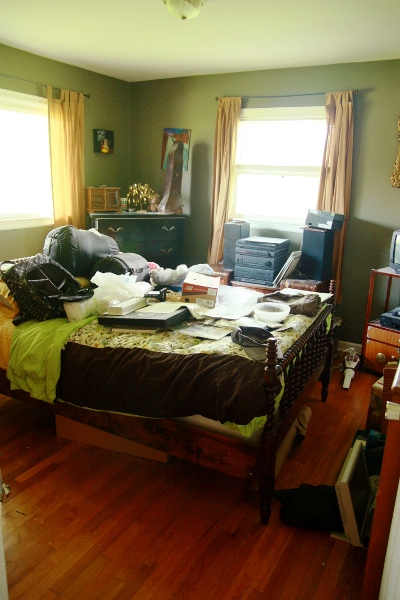
 Now we have a habitable room again! You'll have to pardon the less than savory lighting below. It was after dark by the time I got the mirror hung.


I still need to add a night stand, lamp and some more wall art, but it's much better than where we started!

Saturday, April 20, 2013

Finally Getting to the Guest Room

I have a secret that I'm not proud of. It's called my guest room.


That picture was actually taken after we had already removed everything from the floor, so in the interest of full disclose, it's looking pretty good there.

It had been in that state for quite some time. When people came over, we shut the door and never spoke of it. The room happens to share a wall with the bathroom, and after replacing the electrical wiring, adding lights, and various other projects that required cutting a hole in the wall, it wound up being more patches than anything else, some of which were our first attempts at drywalling. Let's just say they weren't our best work. So, after replacing the water lines called for another hole, David decided we would simply tear out almost the whole wall and replace it with one large piece of drywall. Then we lost motivation.

And so the room sat there, wall partially torn out, for months. As the days passed, junk naturally started piling up. We both finally got sick of it and decided it was high time to do something about the mess, and called in some volunteer reinforcements.


We started by drawing a chalk line across the top where we wanted to cut. We didn't go all the way to the ceiling, because corners are a pain and the drywall above that point was still in good shape.


While removing the wall, we ran into some annoying wire mesh in the corner. David solved the problem by using some tin snips to cut it out all down the corner of the wall. It worked surprisingly well.


Another problem our weird, old house posed was that our drywall is extra thick. In the past, we've just used two sheets of drywall, stacked. It's always been annoying, and when doing a larger wall, it meant we would have had to buy more drywall, instead of using what we already have. David came up with idea of buying some cheap 1/8" plywood and cutting it into strips, which we attached to the studs with a nail gun to build them out.


This would have worked flawlessly, had all the studs been even close to the same depth. Oh, the joys of living in an older home!


After fiddling around with multiple layers of plywood, we finally got it sorted out.


Then we just installed standard 1/2" drywall on top of our new, thicker, wall to match the depth of what was already there. (In case anyone is wondering, the drywall is green because it is mold and mildew resistant. It's what we used in the basement, so since we already had it on hand, we went with it.)


We had hoped to apply the first coat of drywall mud, but we found we had only a tiny amount left, and since it was after 8, we decided to call it a night.

Tomorrow will bring mudding! My least favourite part of drywalling. Hopefully, it will also bring painting and trim re-application and calling this project done, but with so much drying time factored in, I'm not sure that will happen.


Thursday, April 18, 2013

Here I Am

At the prodding of many people, I've decided to start this blog where I can chronicle my adventures in home improvement, gardening, crafting, and planning a wedding. We'll see where it takes me!