Thursday, April 30, 2015

A Cushy Project

While I was super jazzed to get my dining table last week, one thing I did want to change about it was the fabric on the chairs.


It was looking a bit worn from so many years of family dinners, so I wanted to give it a bit of an update.


The first thing I did was remove the 4 screws on the bottom of each cushion to free it from the chair. Then I used a flat head screwdriver to pull out all the staples holding on the old fabric.

Once I got it off, I could see what I was working with. The foam was still in good shape, though a little thin. I decided to just add to it rather than replace it, so I bought a big roll of 1" thick foam along with 2 1/4 yards of the heavyweight fabric that I picked out.


First, I traced the seat onto my foam and cut it out.


It's a like a foam sandwich!


Then, I laid my seat, foam side down, onto my fabric and cut it out. I had planned for a 3" overlap on all sides.


I put one staple on each of the four sides and flipped over the cushion to make sure my pattern was straight and centered.


Then I just went crazy pulling the fabric tight and stapling along all the sides. I made sure to fold under the raw edge of the fabric so there wouldn't be any unraveling.


Then it was time to reattach it to the chair!


I did one chair at first to make sure I knew what I was doing. Once I was sure it came out to my liking, I cut out all my materials and did the chairs all at once.


I'm loving the bright new fabric, especially with my navy rug and wall.


Jawn Watson likes it too!

Saturday, April 25, 2015

Movin' On Up

After my last post, David and I had to chill for a few days while the polyurethane finished curing. I have to admit, it was really weird (but wonderful) to not have anything to do for a few days. We actually relaxed after work! We sat on the couch and watched TV! But once Wednesday rolled around, it was time for me to go into overdrive again.

I started out by re-installing all the quarter round I had removed. I had previously given it all a fresh new coat of paint. There were a few pieces that broke during removal and some of the closets had missing pieces, so I had to buy and cut some new trim for those areas. Once that was up, I caulked the corners as well as where the baseboards and quarter round meet, then painted the baseboards to get them looking fresh and new.

That took just about all day, so by the time I finished up, Scott and Cait came over to eat some dinner with us and be coerced into helping us get started moving back into the upstairs. David and I were SO VERY EXCITED to be able to sleep in our bed again, which we were able to do that night.


It took us a few more days to get everything back where it belongs. Now that we are settled again, it is such an enormous breath of fresh air. I keep walking in to rooms and being surprised at how much space I have to manoeuvre.


One new room we have is what we are calling our Project/Craft room. It's in what used to be our guest bedroom and it houses my sewing machine and a huge desk for David to work on his computer projects.

But the room I'm most excited about is the former living room.

Please feel free to ignore the spackle on the wall.
Which is now a dining room. I've never really seen much point in having a formal living room. I know some families use and enjoy them, but I knew we would not be one of those families.


The table belonged to my grandparents, so not only does it look totally boss, it brings a lot of warm memories with it.


It's still a bit lacking in furniture at the moment, but I will bring in more pieces over time. I would love to have a sideboard or buffet in here.

So that's how we are looking at the moment. We plan to cool it on the big projects for a little while and just enjoy what really feels very much like a new-to-us house. Oh, and did I mention how much closet space I have now? It's unreal!

Monday, April 20, 2015

We're Floored With Our Floors!

After getting things all cleaned and spotless on Thursday, we sealed off that part of the house until we got off work Friday night for staining. Let me just say right here that this step took A LOT longer than I had anticipated.


The first thing I did was to mix all my stains together. The color that I chose (Rustoleum's Kona, of course!) only comes in a quart so I had to buy 4 cans. In case there were any slight variations in color between batches, I dumped them all into a gallon can and mixed them together.


We started in the guest bedroom. I applied the stain to one area with an applicator pad that attached to a long broom handle. Then we set a timer for 5 minutes after which David went back with old t-shirts and wiped up the excess.


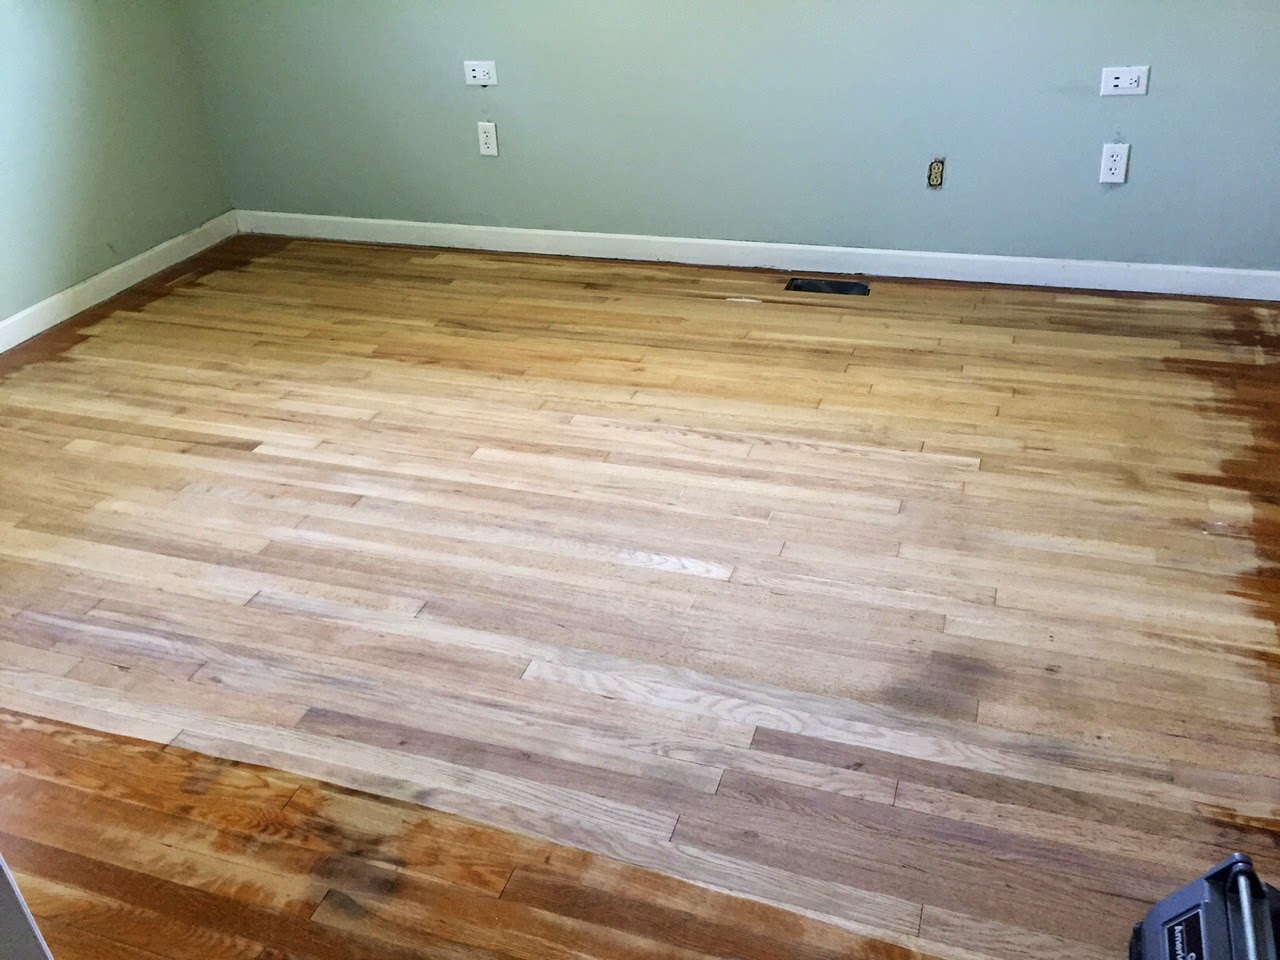
After the first room, we were a bit discouraged by the unevenness of the stain application. We briefly googled to see what was causing it and didn't really come up with a definitive answer. Suggestions ranged from inconsistent sanding to "that's just how it is sometimes." We decided to continue on and figure out what to do if it continued to be a problem.


In subsequent rooms, I applied the stain along the long wall of the room, making each pass parallel with the direction of the wood. This seemed to help a lot, though didn't completely remedy the issue. We also began doing two rooms at once to speed things along.


Even so, it took us until 1 in the morning to stain ourselves into a little box...


...and out the front door.


We did find quite a surprise as we stained in the living room: pup paw prints! Chico had walked on the bare wood a few days earlier with wet feet. I figured since the prints dried and were no longer visible, it wouldn't be an issue. Apparently that was quite wrong.


The next morning, David sanded down the offending prints and re-stained those areas, which fixed the problem.


I was still a bit unsure about my stain color selection even as we went to apply it, but I absolutely love the color. It's exactly what I was looking for: a deep brown without a lot of red or yellow undertones.

After I got off work Saturday afternoon, we got down to business with polyurethane. We opted to go with the oil based mainly because of the cost. Water based requires one additional coat, costs more per gallon, and doesn't cover as much square footage per gallon. It was basically a difference of $400 for water based or $160 for oil based. There also wasn't a huge difference in dry times between coats (4 hours for oil vs 2 hours for water) and both required three days before regular use. We also chose a satin finish because I prefer the look and had heard it is better at hiding scratches and dirt than a higher gloss finish. With a dog and two cats in the house, hiding scratches and dirt is high on our list of pros.


Before applying the first coat, we went over the floors once more with tack cloths since some debris had been brought in and stirred up during staining. Then we opened all the windows and turned on all the ceiling fans (after cleaning them off with tack cloths, of course). Then I got my lambswool applicator and applied the poly. I used long strokes without lifting the pad off the floor until I reached a wall. If I had to lift it off early, I made sure to use a sweeping motion as I lifted to avoid lines in the finish. As we applied the poly, some stain came off with it which seemed to help out the blotchiness issue quite a bit, much to our relief.


I did the majority of the first coat by pulling the applicator behind me.

Sorry for the blur. I was movin' and groovin'.
It wasn't until I was almost done when I realized it was much easier to push it in front of me. After that realization, I finished all the subsequent coats in that manner.


Here's a pro tip: Don't put your phone and drink on a window sill and then finish the floor in front of that window without moving your things. Otherwise, you'll have to stare longingly at them through the screen for the next several hours.


Once the recommended four hours had passed, we came back inside to check on how things were drying and also to get my phone and drink. There was one area in a bedroom that was still tacky, so we left it for another hour before moving on to coat #2.

We applied two coats on Saturday, and the final coat Sunday morning. Our poly did not require sanding unless more than 12 hours have elapsed between coats. Because we didn't want to go through the extra work of sanding and removing the resulting dust, we strategically timed our applications so that we wouldn't have to.


The floors were dry to the touch when we re-coated, but the poly was still very soft and easily scratched so as we stepped inside the house, we removed our shoes and slipped on a fresh pair of these sexy booties. Not only are they very stylish, they are apparently made for someone with a size 20 foot, which meant my size 4 feet were constantly tripping on the excess material. Not cool.

After the final coat was applied, we have to wait 24 hours for "light use," which is a term I don't fully understand, and three days until we are free to go wild on it and move our furniture back in.

As far as fumes go, they really weren't that bad when we had the windows open. As we were applying the poly, it was pretty strong, but in the rest of the house it's not very noticeable. It's been raining the past two days so we had to close things up and now it smells pretty strongly of burning rubber on that side of the house, though in the basement and kitchen it is still very minimal.


Here's how the color is looking with three coats of polyurethane on it. Since we used the oil based it definitely made the color a little warmer, but it actually makes me love it even more.


David and I were discussing how neurotic we are now going to be about keeping these floors pristine after putting so much work into them. We joked about putting a clear floating floor over top of them so no one can scratch the finish.


Don't mind the giant hole in the floor. I only almost fell into it a few times while finishing the floors. It's our air return for the air conditioner.


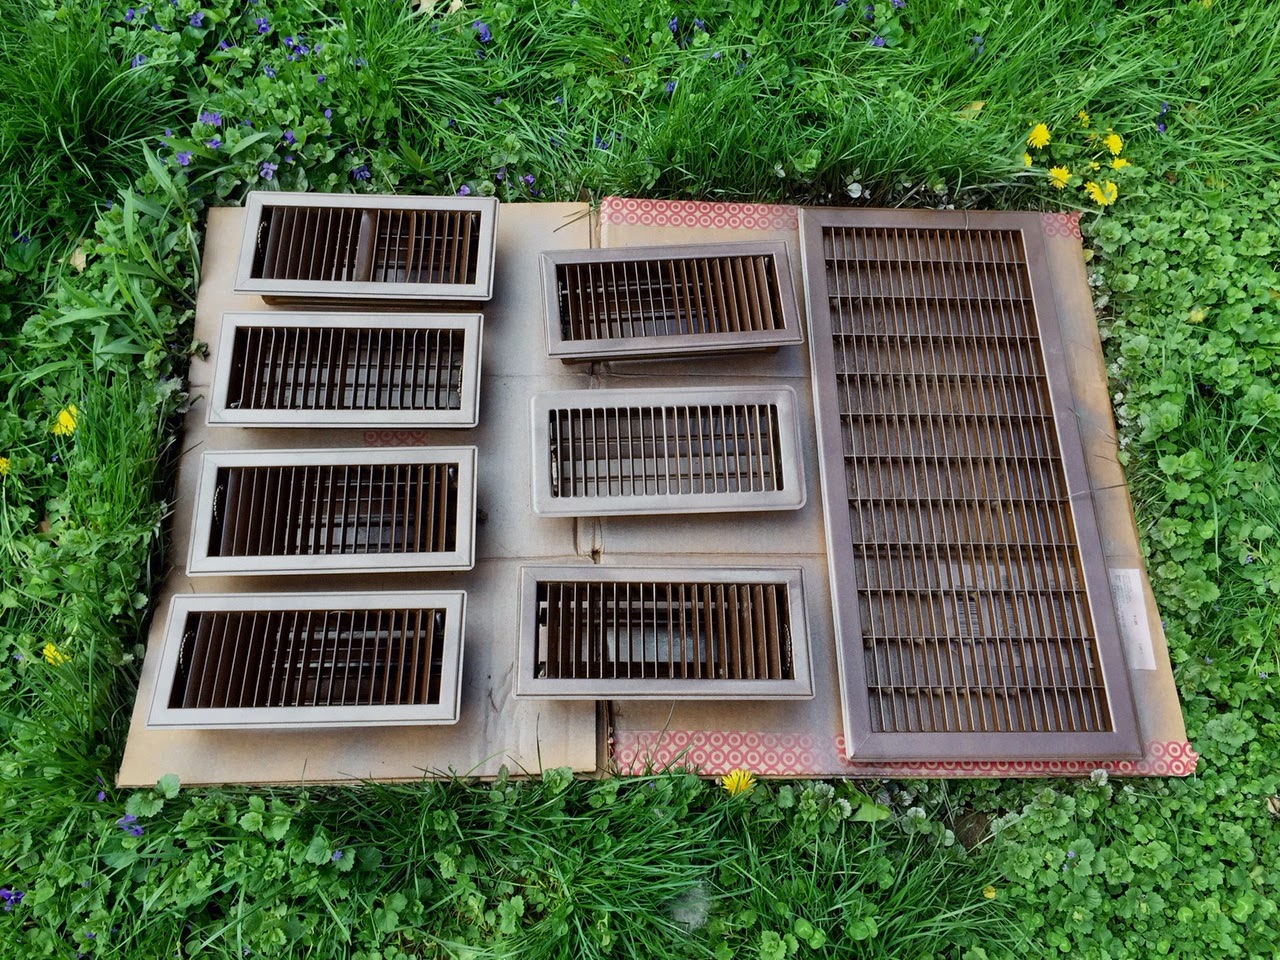
Here's how my spray painted vent covers are looking. Not a perfect match, but definitely much more subtle than before!

In summary: Am I glad we did this? Yes! I'm absolutely in love with how they turned out and we saved thousands of dollars over having a professional do it. Do I ever want to do it again in my entire life? NO WAY!

Thursday, April 16, 2015

Our Beautiful Bare Naked Floors

So my house is kind of miserable to live in right now. David and I both agreed that we feel like we are staying at someone else's house (who apparently needs to be on Hoarders) and we are both very much ready to go home now.


There are nightstands in my bathroom closet and a box springs in my kitchen. We are sleeping in the basement guest room and if we have to get up in the middle of the night you have to pray you don't stray off the narrow junk-free path and break your arm.


So here's how our floors were looking Saturday afternoon. All those white spots you see are wood putty that I put in all the gaps and gouges I could find in the floor. David also spent some time finding a lot of the squeaky areas and driving in a few finish nails to make things a little quieter. I had also previously removed the quarter round from each room.

Saturday night, we went over to Home Depot to rent our floor sander. They hooked us up with a rectangular buffing sander, which is basically a big rectangular piece of sandpaper that vibrates really quickly. We put on some 20 grit paper and dove in.

We sanded. And sanded. And sanded some more. For three hours in a 10'x10' bedroom.


This was as far as we got. Not even close to bare wood. We had known before that our floors were not originally finished with polyurethane. It was either shellac or laquer or a mix of the two. We had also heard that shellac was extremely difficult to remove. Apparently "they" weren't kidding.

At this point, I was ready to say forget it and then set the house on fire. I probably would have (given up, not resorted to arson) if we hadn't just spent the last two weeks moving out of the first floor of the house. Instead, we decided to return to Home Depot in the morning and rent a drum sander.

We had shyed away from a drum sander inititally because of all the warnings about how easy it is to ruin your floors with one, but I was so frustrated at this point, that was a risk I was willing to take.


By contrast, this is 15 minutes of work with the drum sander. I nearly wept with joy.


David chugged along on the drum sander with 36 grit paper, and as he finished each room, I followed behind him with the buffing sander using 20 grit paper to smooth things out a bit, catch any spots he missed on the first pass, and also rough up the edges the drum sander couldn't reach.


Then I made a final pass with the buffing sander using 80 grit paper. Neither sander was nearly as dusty as we had anticipated. The drum sander did an excellent job of collecting dust and left next to nothing behind while the buffing sander left a lot of dust on the floor, but there was nothing floating around in the air, which was a very pleasant surprise.

This week David and I used our hand held orbital sander to get all the edges down to bare wood. This was an extremely unpleasant task. Each room took about 2 hours and produced A LOT of dust which covered everything. Also, I think I may have nerve damage from such prolonged use of the sander. I haven't had feeling in the tip of my index finger for a few days now. Hopefully that will return now that the sanding is complete.


The bare wood is soooo pretty. I'm almost tempted to put poly over it without staining, but I know it wouldn't look the same.


We are cleaning all the dust up now in preparation for staining tomorrow night. This involves many, many sessions of sweeping and vacumming and using tack clothes to make sure the floors are spotless.


One quick project I tackled in between sanding and cleaning was to spray paint our floor vent covers. They matched the old look of the floor well, but I knew on the darker stained floors they would scream, "HELLO, I"M AN AIR VENT!!"


I picked up a can of burnished amber spray paint at Lowe's and gave them a few quick coats.


Not  only do I think the color will match pretty well, but the vents look like new! So fancy.

So after staining tomorrow and applying finish this weekend, we will be looking at moving everything back upstairs by Wednesday. I CANNOT WAIT.