Sunday, March 29, 2015

It's Finished!

After my last post, we finished putting up the remaining baseboard. Then I scooted around the basement and put one last coat of paint on it to cover all the nailheads and scuff marks from where I hit it with the hammer. Then we swept and mopped the floors about 10 times. We had purchased some floor cleaner and polish that was made by the same company that did our floors and we applied that in the living room and were pretty displeased with the results. It left a blue haze in a lot of areas. David is looking into what we want to do about that, if anything. I am leaning more towards seeing if it goes away with time.

Now, after 6 months of working all day, then spending all evening in the basement, after every weekend being spent downstairs, after countless, "Well, I guess we should get to work downstairs..." "Yeah, I guess so...", I can seriously say that the basement is finished! We are planning to move furniture down today, but before we got started with that, I took some pictures of each room in their fresh, empty state. I'll also be adding some "before" pictures that I took when David first bought the house.

Enjoy! I know I am!!


Friday, March 27, 2015

Stairway To Heaven: The Final Saga

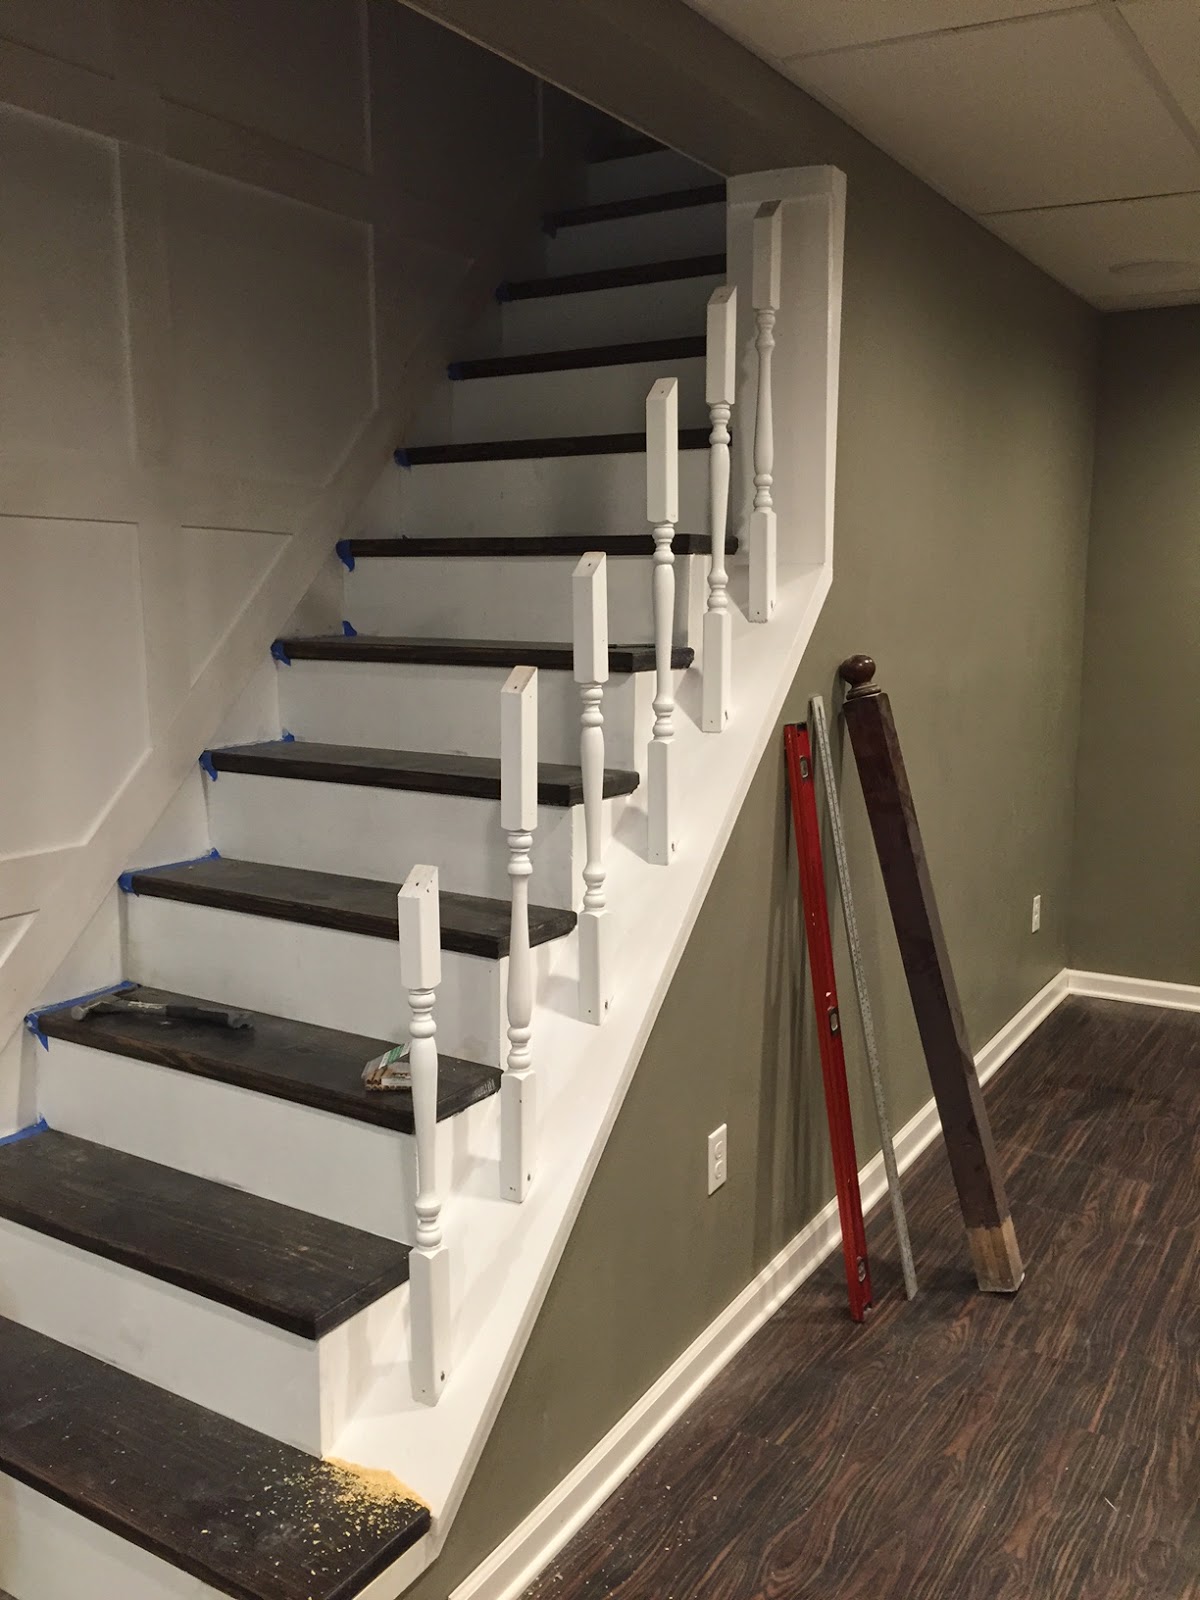
When I last wrote about the stairs, this is how they were looking, and I asked you kind readers to ignore what I had going on on the walls.


Well, you can ignore no more because I am going to tell you all about it.


The first thing that needed to be done was to cover the little half wall next to the stairs. I used 1x lumber to do this. Fortunately, our stairs are at a convenient 45 degree angle, so it made it easy to cut the ends of the boards to sit flush.


I did have to use a chisel to remove a tiny bit from the bottom corner of the treads to let the boards slide all the way against the stringer.


I also had a nice little gap underneath that I used my handy dandy plywood to cover. I just cut a 2" strip and nailed it in place. I also sanded down the edges of the risers with a power sander so that they were smoother and more flush with the stringer.


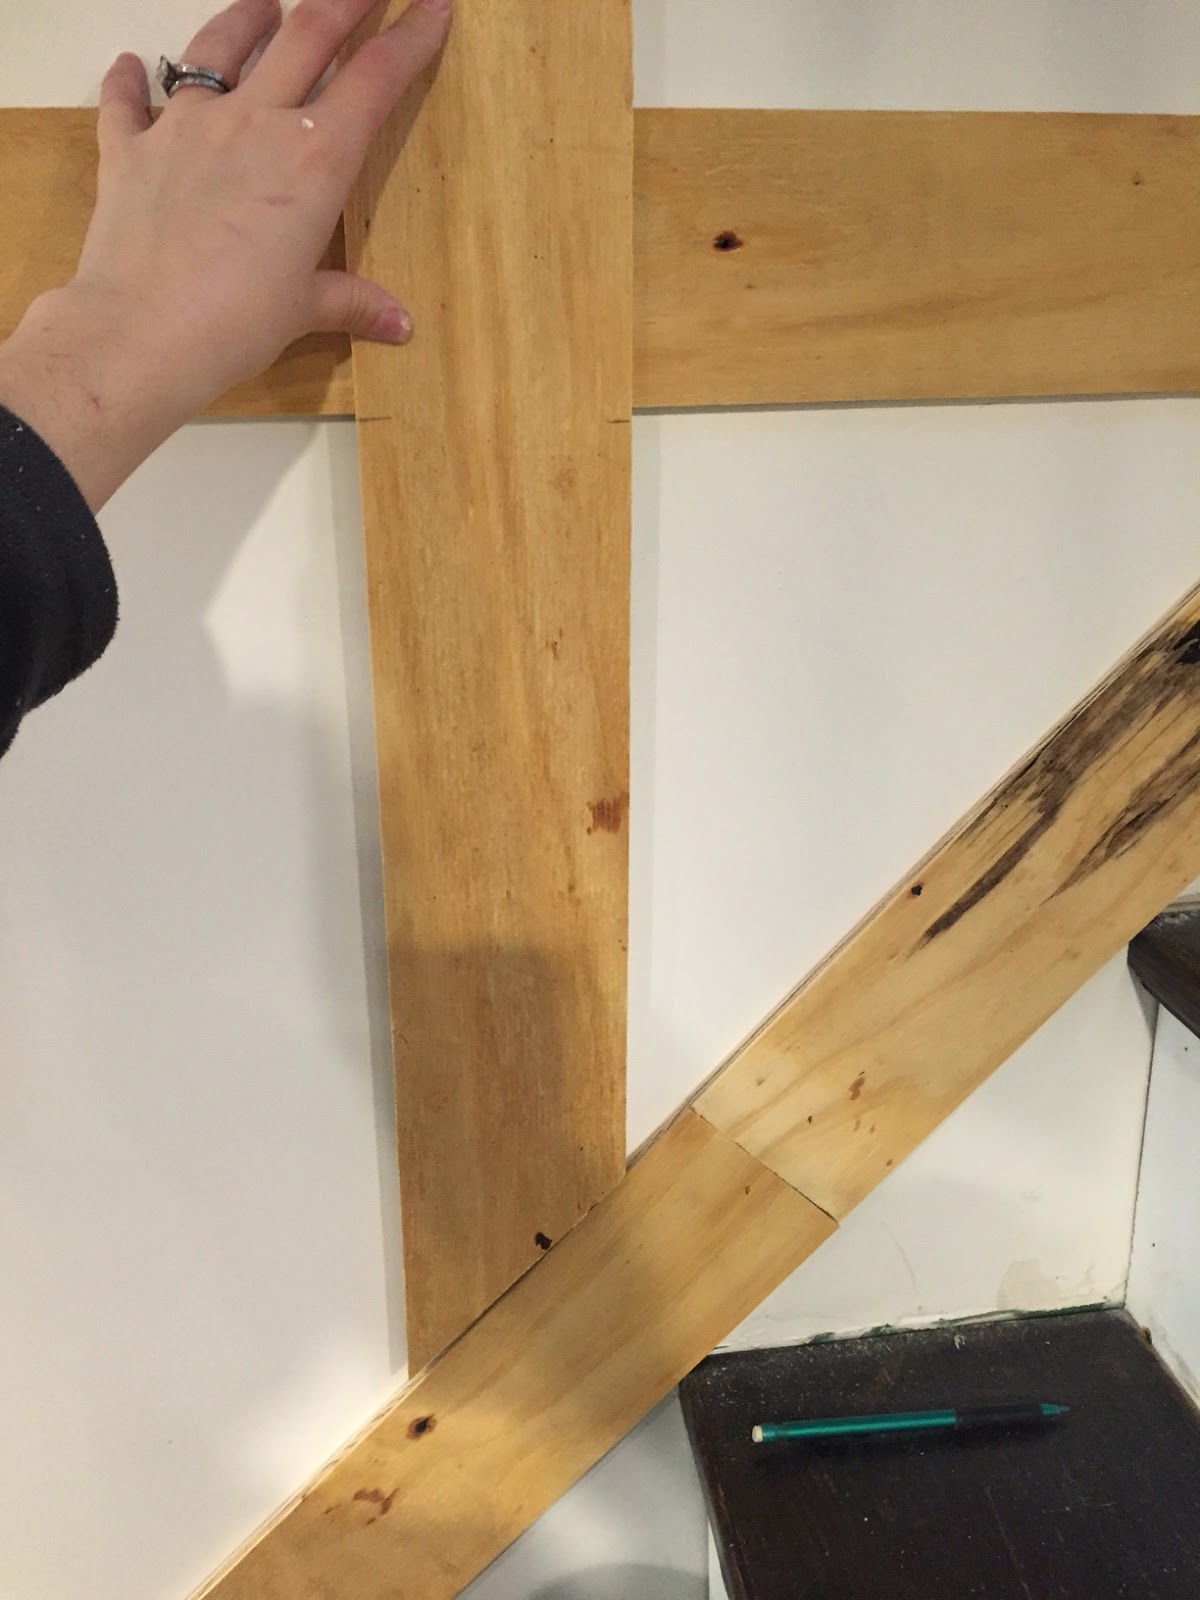
Once that was done, it was time to get started on a project I had been looking forward to for a long time. Square wainscotting on the stairwell wall. I used a 4x8 sheet of my plywood and cut it down into 4" strips. One sheet was enough for the whole project. I decided I wanted my squares to be 24" just by measuring and holding up wood on the wall.


I used a 1x4 board with a 1x2 on top of it to create a little shelf along the top, then just measured, cut, levelled, and nailed like crazy. I put up the border pieces first, then the horizontal pieces, then the vertical ones last.


I found it was difficult to accurately measure when a board intersected with the diagonal board. I got around this by cutting the 45 degree angle on one end, then holding the board up in place and marking where it needed to be cut.


Not all of my spacing is perfect and I did fudge a few areas to avoid having tiny little squares that would look weird. I don't think anyone would every notice though.


One problem I did run into was the light switches. The board just barely ran into the cover plate. So I boxed around the switches so they would all be sitting at the same level. I had to use spacers to push the switches out farther, but it was a simple fix.


It took me about 2 days to get all the strips on the wall.


Then I caulked and puttied like crazy. I covered all the nail holes, large knots, and seams with wood putty and ran a bead of caulk where the wood met the wall inside the squares.


Then it was time for painting, which Cait (from My Old Ky House) very graciously assisted me with.


So much painting. We covered the wood and the wall with 2 coats of white semi-gloss.


Then it was time to attach the bannister.


We used 3/8" dowel pins to attach the spindles to the half wall.


We purchased a newel attachment kit to make the newel post good and secure. These brackets will be covered by trim pieces that were included in the kit.


Then we trimmed down the old hand rail and screwed it into the newel post and the wall on each end as well as to each spindle.


We used the rest of the hand rail at the top of the stairs, where it is attached to the wall with handrail brackets.


And with that, we were done! And also ready for our final building inspection. Spoiler alert: it happened this morning and WE PASSED! Which means we are all done as far as the city is concerned and are free to move in furniture and use the space. We have a little bit of baseboard left to put up, then a very thorough cleaning is due before we start moving in. I have several fun decorating projects lined up that I can't wait to get to.

Thursday, March 26, 2015

A Post About A Post: Disguising A Basement Support Pole

Before I start talking about the support pole, I want to mention a little project I did that I am super thrilled with. I knew I wanted to put a cabinet in between the washer and dryer, but I also knew that a new cabinet in the size I needed from Lowe's was $85 and I really didn't want to pay that much. So I started hitting up the Habitat for Humanity ReStore a couple times a month and browsing their cabinet section. The first few times I came up empty handed, but then one day I found this guy:


It had an ugly paint treatment, but wasn't too dirty or broken like a lot of the cabinets. It also had slide out shelves in the bottom part. And only $10? YES, PLEASE. I couldn't get it to the register fast enough.


I applied two coats of paint, attached hardware (both paint and hardware match what is in the kitchen), then stained and poly'd a piece of leftover butcher block counter for the top.


Then we brought it downstairs, screwed it into the wall and attached the top.


Love it! And I saved $75, which is always a huge plus.


So about this column. There are several in the basement, but all of the others are hidden inside walls. We knew we wanted to wrap this one in wood to make it all nice and fancy.


To get the dimenions of the boards we would need, we measured this top plate, which was the largest part we needed to cover. Then we went out and bought 2 1x8's and 2 1x6's.

Then came the hard part, which was figuring out how to attach the thing. It was concrete on the bottom and metal and drywall on top, which wasn't exactly the best for attaching things to.


We started out by holding the boards in place around the column to see how much space we would have at the bottom. Then we cut some little pieces of wood to fit and screwed them into the floor with concrete anchors on two sides.


Then attached two of the boards with the nail gun. I also used wood glue and finish nails to attach the edges of the two boards.

We only used wood on two sides because the other sides of the pole had very lumpy concrete that we couldn't really attach anything to cleanly. Since all four boards would be attached to each other, the two supports were plenty.


Now when we got to this point we still had no idea what we were going to do to attach things at the top. We brain stormed for a while when we come up with the idea to insert spacers at the top.


We wedged them in on three sides and nailed them in place. They aren't actually secured to anything on the pole or header, but they keep everything so snug against the pole that there isn't any room for movement.


For the final board, we nailed the spacer onto the board and then attached it to the others.


After that, we placed a few clamps and let everything dry overnight.


The next night, we cut baseboard and shoe moulding and nailed them to the top and bottom of the column.


Then I caulked all the seams and gave everything a few coats of white semi-gloss and called it done. Not having that rusty pole hanging out down in the basement really makes the space feel a lot classier.

Also classing up the space are my stairs which are 100% done as of today. I'll have a post about that tomorrow so be sure to check back.