Thursday, September 26, 2013

I Saw the Sign...

The wedding is going to be... well... in the middle of nowhere. While I assume most people have GPS these days that will show them the way, I figured having some signs up to assure people they are, indeed, still going the right way certainly couldn't hurt. So I got on that and knocked out three signs in about an hour.


I started out by cutting out the sign parts and posts using scrap wood that I had in the pile. I used some treated and some untreated. Though they will be outside, it's for only one day, so using untreated wood won't pose a problem. For the sign part, I used 1x6" boards and for the posts, I happened to have a decking board that had been cut long ways into a nice post size. I made each sign in the shape of an arrow, using the corner of a sheet of paper to trace the angle. I cut out each piece using a jigsaw, then screwed the post onto the back of the sign using two screws. Make sure to pay attention to which way the arrow is pointing.


I designed my wording on the computer, then printed it out. I then traced the letters over the wood with a pen, using a lot of pressure.


This left a nice little indention, which I then filled in using a black paint pen.


And that was seriously it! If you wanted to, you could paint, stain or seal the wood, but I opted to leave mine natural for simplicity's sake.


Hopefully, they will help point guests in the right direction so no one gets lost out in the country!

Two Quick Wedding Crafts

In case you're starting to sense a theme in my posts lately, you're not wrong. The wedding is in 16 days so I have been getting a lot done the past couple weeks.

The first thing I made was a card box. One of those practical things you need to have that is easy to forget about. I didn't want to spend much time or money on this item, so for the most part, I worked with what I had.

I started out with a cardboard box that I got for free at the liquor store. Stay classy, friends. I also used some extra fabric I had from making curtains in the office. This "fabric" is actually two twin sheet sets. I used the flat sheets for the curtains so I still had both pillow cases and fitted sheets left.

The first thing you want to do is tape your box shut. Then use an exacto knife (or box cutter) to cut an opening in the top that will be the opening people drop their cards into.

For this project, I cut up one of the pillow cases so I was working with a flat piece of fabric. Then, I sprayed my box with spray adhesive and smoothed the fabric over the top of it.


The edges and bottom, I folded as though I was wrapping a gift. When everything was nice and smooth, I glued down the edges with hot glue.


Then, I used an exacto knife to cut through the fabric that covered the opening. I used a glue gun again to fold the edges under and hold them in place for a clean edge.


I found a cute slate sign at Michaels, which I hot glued to the front of the box and used chalk to write "cards" on it.


And that was it!

Next up was a chalkboard sign outlining mine and David's "love story" or the series of major events that lead up to the big day.


I started out with an ugly old frame that I found at the Goodwill for $3.50. I removed the staples holding everything together at the back and took apart all the pieces. I gave the glass a good cleaning, painted the frame with a sample pot I had already, then painted right over the art with chalkboard paint that I mixed up.


Looking much better already! I started free-handing my words and was happy with my heading, but the dates and events just weren't coming out the way I wanted. At Cait's suggestion, I designed my text on the computer, printed it out, the covered then back of the paper with chalk. I held the paper on my chalkboard surface and traced over the letters with a pen. This provided a faint outline for me trace with the chalk.

This method provided a much cleaner look that I was much happier with! I then reassembled everything, using duct tape to hold everything together, in place of the staples that were originally there. Not the most secure thing in the world, but it will hold well enough for its purpose.


I worked on both these projects sporadically over a few days, but if you were ready to get down to business, each could be completed in about an hour.


I'm sure I'll have more projects to share as the day gets closer and closer!

Wednesday, September 11, 2013

Wedding Party T-Shirts

After seeing lots of cute bleach pen shirts on Pinterest, and reading a few tutorials, I knew I wanted to make some for me and my bridsmaids to wear during my bachelorette party and also white we are getting ready the day of the wedding.


I got some plain v-neck t-shirts from Target for each of us.


I took a piece of cardboard and wrapped it in wax paper. It only needs to be as big as the design you're putting on the shirt.


Slide the cardboard inside the shirt behind where the design will go, then smooth everything out.

Then go to town with the bleach pen. I had never used one before, and it's not as much a "pen" like I expected, as it is a small opening like an Elmer's glue bottle.


If you make a mistake, it's best not to try to fix it. I accidentally got a drip and made some things a bit too thick and globby but it probably would have looked worse if I had messed around with it any. You can go back over and thicken up any thin spots so everything is an even thickness.


Let them sit for 10 minutes or so. You can see around the edges of the bleach and through the back of the shirt that it's working. This next part if definitely easier if you have a helper. Here's how we did it.

I held the shirt open from the neck, keeping the top and bottom layers from touching while Cait removed the cardboard. Then, we carefully turned the shirt upside down (so the bleach design was facing the floor) then put it under the faucet.

Turn the water on high and rinse the bleach off from the inside of the shirt so that any bleach falls straight down into the sink without smearing onto any other part of the shirt.


Once it's all rinsed off, use hand soap to wash it and then run it through the washer and dryer.


Super simple! The hardest part was making sure I didn't spell anything wrong! Now that I've done these, I wanted to make even more bleach art clothing.

Bling Bling Holder

For the wedding, I knew I needed something to hold our rings during the ceremony. We aren't using a ring bearer and the bridesmaids dresses don't have any pockets, plus I didn't want to put the pressure on them of having to keep track of something so small and important. I found some inspiration from this pin and adapted it to fit my needs.


I started out with a small wooden box from Michael's for $1. I knew that I didn't just want the rings loose in there, but I also wanted them to be easy to remove during the ceremony so I didn't want to tie them down or anything like that. I first considered using dowel rods to make a ring holder (like this). I wandered around Michaels quite a bit pondering my options, when I came upon a particularly thick sheet of foam in the kids' craft aisle. I took it home for an additional 99 cents, and went on my merry way.


I started out by cutting out a rectangle of foam the same size as the interior of my box and then checked the fit. I cut out two more rectangles using the first one as a template. I pushed all the pieces of foam down into the box, one on top the other, then used a knife to cut three slits, one for each ring. Putting my engagement ring back on is part of our ceremony, but you could just cut two slits if that's all you need. They don't have to be perfect because you won't really see them once the rings are in place. I pushed the rings into the slits to make sure they fit and were spaced well.


Then I took the foam back out and stained my box. The stain color was Kona by Rustoleum (the stain I bought for my failed counter top project).


Once the stain was dry, I glued all the layers of foam into place in the box using plain old Elmers glue and allowed that to dry. Then I used a white paint pen to add some words to it.


It was an extremely simple and cheap project and I think it turned out super cute!

Sunday, September 1, 2013

Refinishing the Bathtub


I had mentioned before that we planned to refinish the bathtub down the line. I knew this would put our one and only shower out of commission for a while, so it needed to be timed just right. I figured with a three day weekend coming up, it would be the opportune time to get 'er done.


Our tub was quite gross looking. The bottom had almost no finish left, and thus, grime accumulated and Would. Not. Come. Up. If there is a cleaning product, homemade or store bought, I have probably tried it with no success.

I had originally planned to use Rustolem's Tub & Tile Refinishing Kit because it was only $25 and I had read many reviews and blog posts from people who had used it. However, when I went to Home Depot to purchase it, I discovered it was an oline only product. I had to have it within a day in order to finish up over the weekend. So I went to Lowe's instead and spent $10 more on the Homax Tough As Tile Refinishing Kit. I couldn't find a lot of others' experiences with it, but I read reviews on Lowes.com, which were ripe with helpful tips.


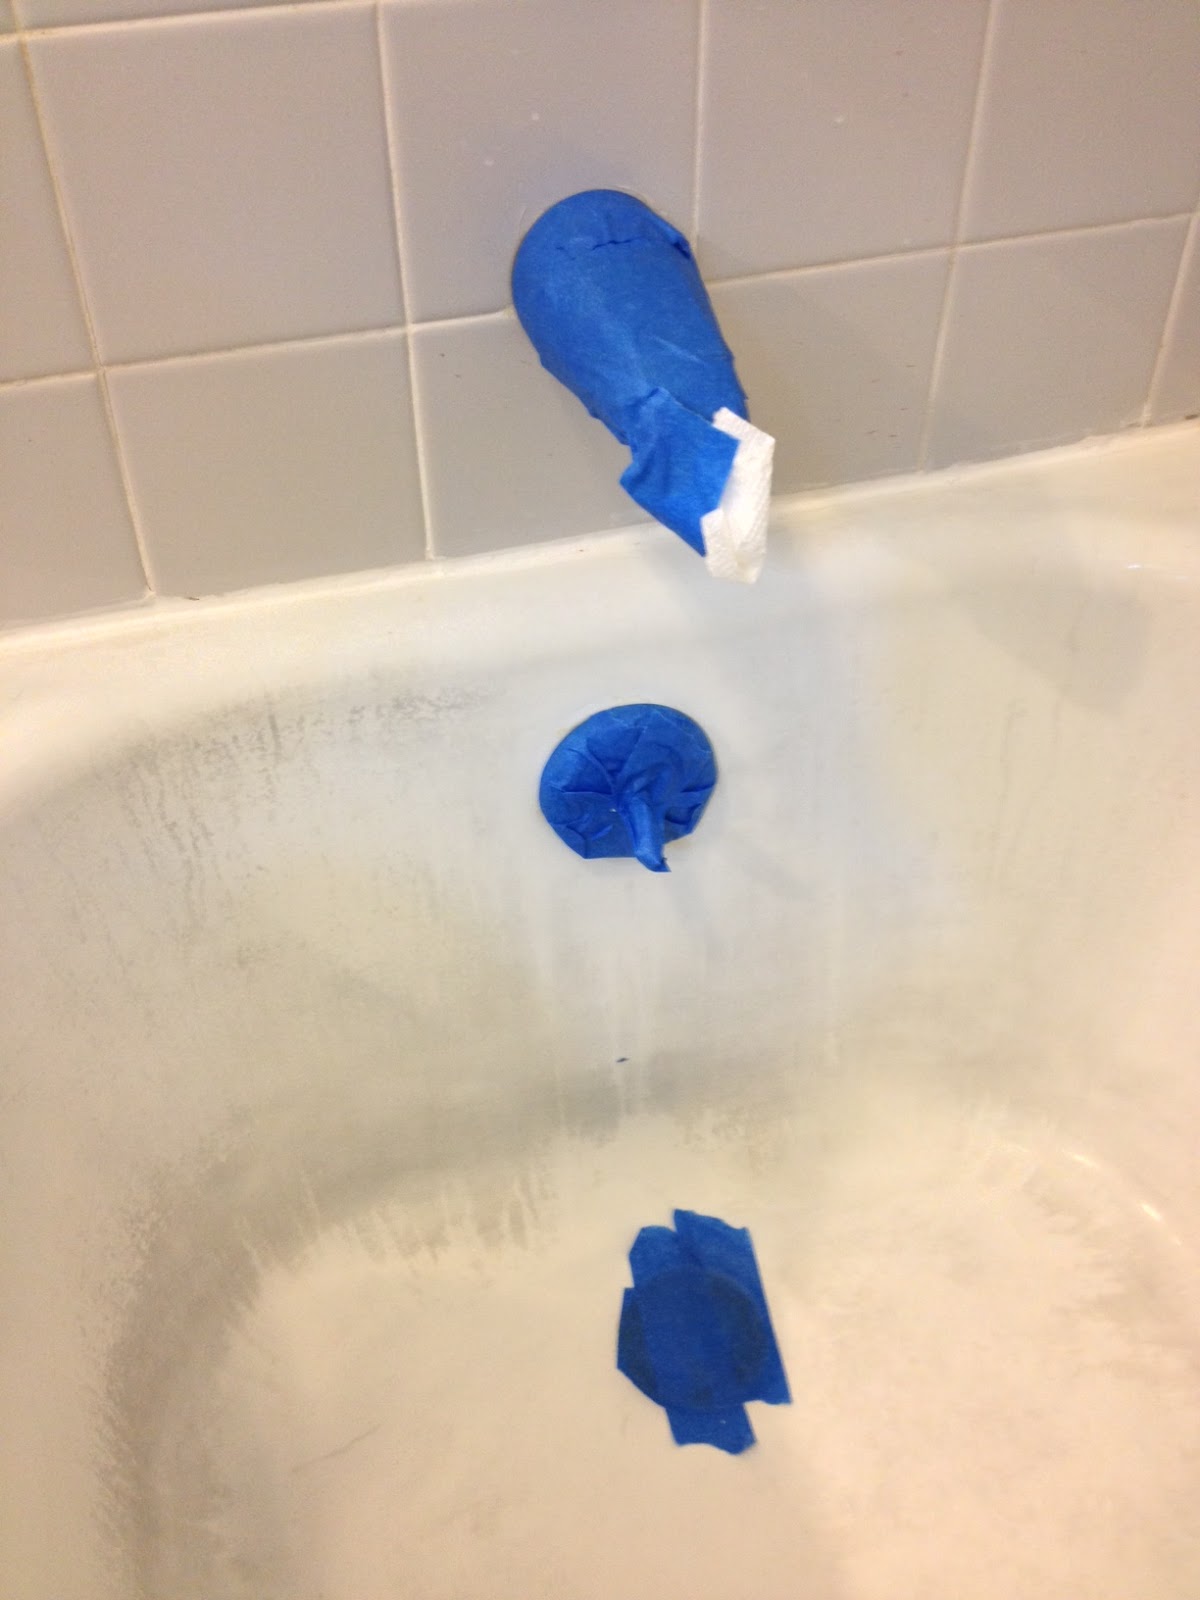
I followed the prep instructions to a T. I scrubbed the tub with the included cleaner, rinsed, dried, scoured with steel wool, then rinsed again. I did this three times and my arms were quite tired. Then I dried everything very thoroughly and taped off anything that I didn't want to paint.


I also stuffed a paper towel into the faucet to prevent drips. Once I was sure everything was 100% dry, I got started painting.


I got the brush on version (there's also a spray on version) because I didn't want to fool with covering every surface in the room to protect it from overspray. I made sure to start at the point furthest from me and work my way forward so I wouldn't be leaning over wet areas. I also put my hair in a pony tail because I shed like crazy and I didn't want a stray hair ruining my finish. I used brand new brush because I didn't want any old paint residue getting in the way.


It needs to be applied super thin. It is a self-leveling product, so the brush strokes will start to fade as it sits.


It is quite fumey, but not as eye-burning, nose bleed-inducingly strong as I expected. I worked as quickly as I could because it begins to dry pretty quickly.


Once the first coat was on, I shut the door to the bathroom and left the exhaust fan on for 2 hours. I was tempted to open the windows in the house, but the instructions say to keep the temperature at 72 degrees with less than 80% humidity. The day I chose to do this, it happened to be in the 90s and extremely humid, so I kept the windows shut. I did leave the temperature in the house at its usual 74-80 degrees during the  entire curing process and it doesn't seem to have hurt anything.


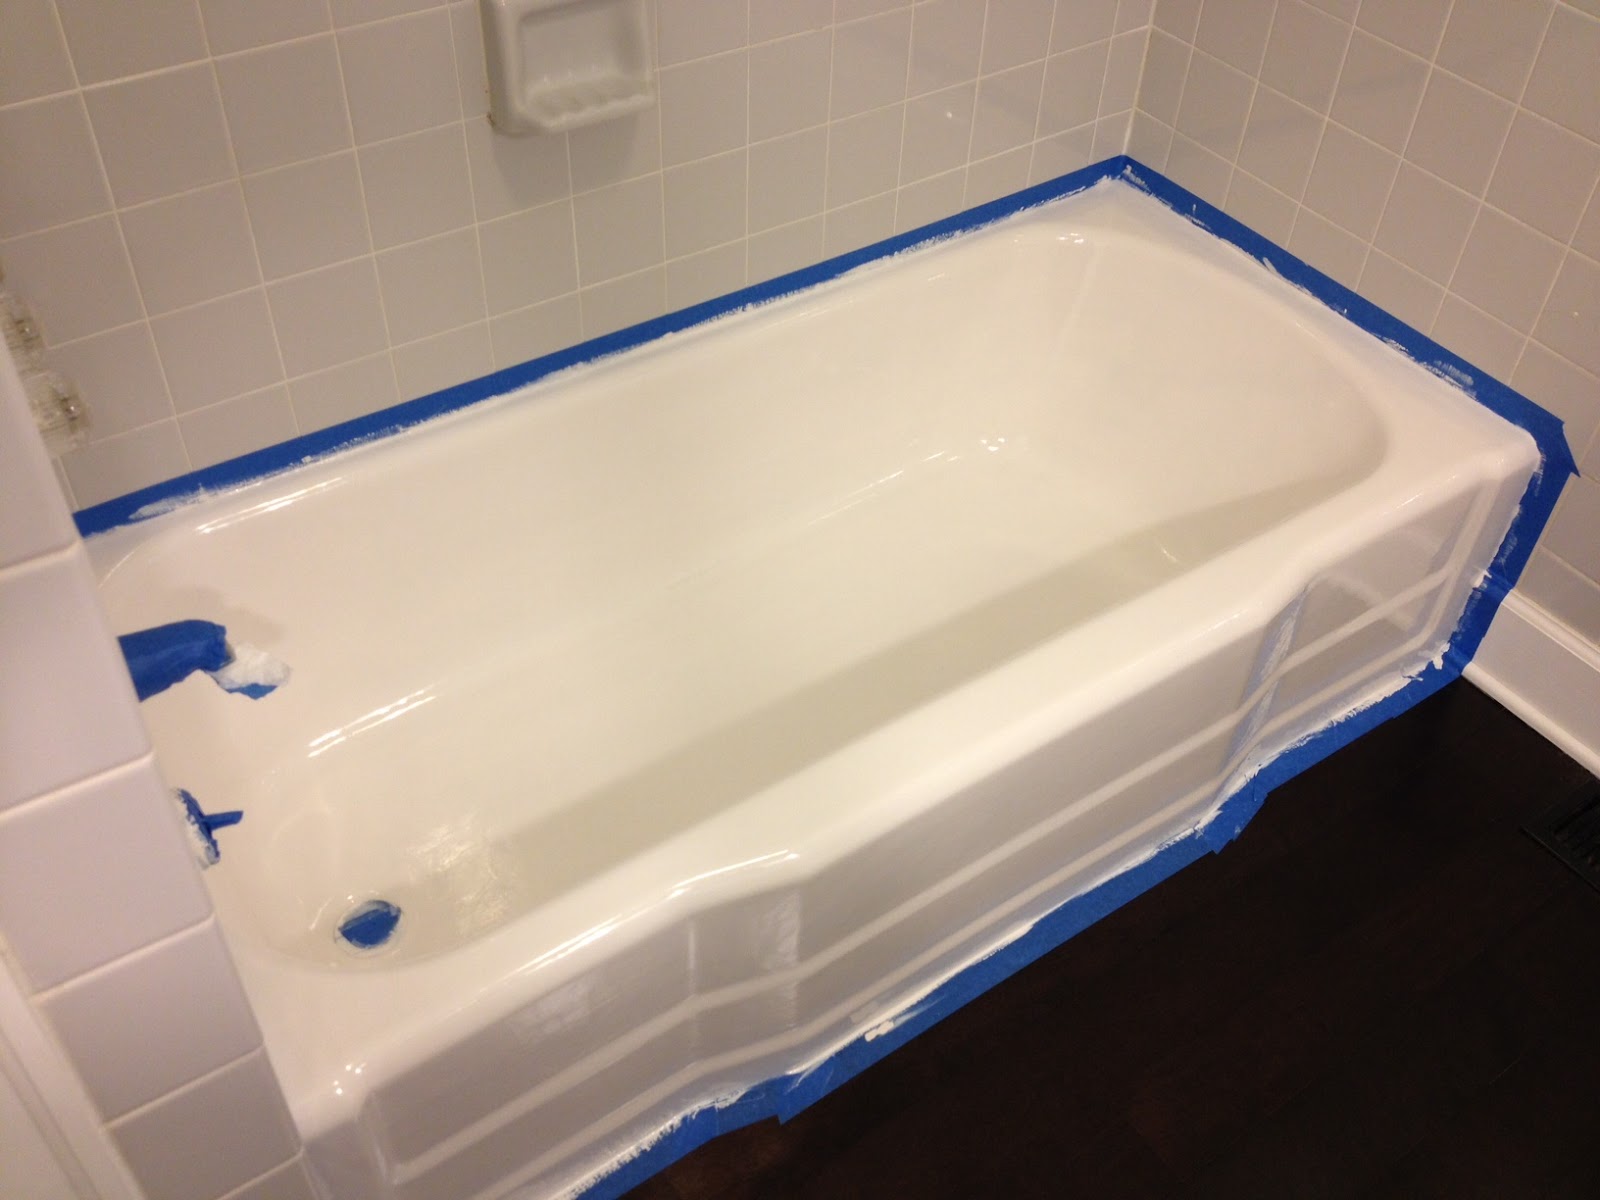
The second coat has to be applied after 2 hours, but sooner than 4 hours (otherwise it has to cure for a full 72 hours before reapplying). I brushed on the second coat in the same way as the first, then cleaned everything up (leaving on the painter's tape, as the directions say), then shut the door with the exhaust fan on and left it alone for a full 72 hours. I also turned off the water supply to the tub because David realized we can do that now that we have a PEX water line system. We're so fancy!


Is the finish perfect? No. If you sit there and stare at it, there is some texture that the  brush strokes left behind, and there are some thin spots that I would touch up if it didn't mean going another 3 days without a shower. I don't think it's realistic to expect a $36 kit to look as good a professional re-glazing that costs 10 times* as much. But am I happy with it? Absolutely. What was once a dull, dirty tub is now bright white and super shiny. And I know no one that comes into my bathroom is going to spend more than a half second contemplating my tub, so to them, the finish is going to look perfect.

*I totally pulled that number out of the air. I have no idea how much a professional re-glazing costs, other than "More than I want to spend if I don't have to."

Wednesday, August 28, 2013

Planning Out the Basement


The basement in this house is kind of the bane of our existence. When David moved into the house, the basement was "semi-finished". It had a floor and a ceiling and walls, but it was dark and scary.

He quickly got started ripping things out to make way for a bedroom that was completed a few weeks later for a roommate that was moving in.


It has an egress window that lets in lots of light and actually feels like a real room that's part of the house. For those of you not in the know, an egress window is one that has to meet certain specifications so in the event of a fire or other emergency, someone can escape out of it. Installing it required digging a window well on the outside. An egress window is required to have a legal bedroom in a basement.


As for the rest of the space, 4 years later, not much else has happened. All the old wood paneling, flooring and ceiling has been removed.


Insulation has been put up over most of the walls and ceiling, and some walls have been framed out.


This is the current layout of the basement.


And this is where we'd like to end up. The big hang up here is the bathroom. We need to get a plumber to come and assess the situation with sewage ejection pumps, drain lines, etc. and give us a quote. We may scrap the entire idea of a bathroom if the job is out of our budget, otherwise, we will need to get permits (both plumbing and electrical) as well as inspections for everything before we can proceed much further. In the meantime, I've been soaking up lots of inspiration from Pinterest.


railing for basement?

I'd love to see some light and airy colors to make it feel as little like a basement as possible.
Why waste a perfectly good space by closing it off with a wall? Basement nook for reading or relaxing
I am also loving the idea of having a built in reading nook. So cozy!

Beautiful laundry room 
Not to mention having an attractive, functional laundry area with storage, instead of what we are working with now. I may or may not feel like I'm going to be murdered while doing laundry.


Recently, we have been making a push to get more done downstairs (I've declared no more major projects until this is complete) so hopefully in another 4 years, we will have a beautiful finished basement! Har har.

Thursday, August 22, 2013

Sprucing Up the Garage Door


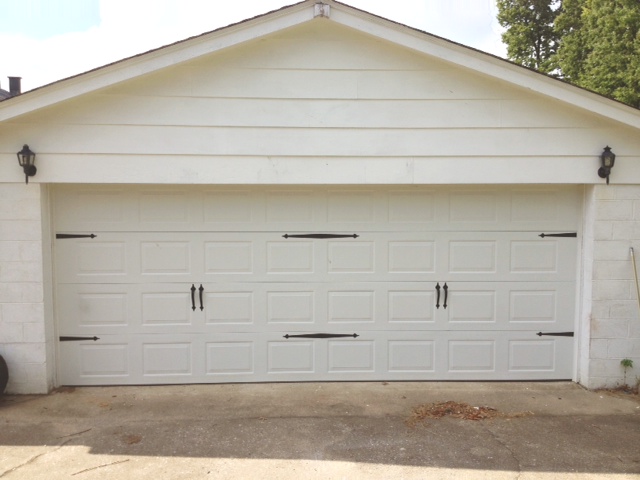
A couple of years ago, we had the garage door of our detached 2 car garage replaced. I'm pretty sure it was the original door that was installed when the garage was built in 1968 and it had become an unreliable safety concern. This is one job we felt more comfortable leaving to the pros, and so we had it professionally installed. I had dreams of replacing the old door with a carriage style door. However, our new door had to be special ordered (it's even larger than your standard double door) and, due to its size, required a more powerful (read: more expensive) motor to heave it up. Once I saw the cost for the carriage style door (even for a standard size) I knew that wasn't going to be an option.

Recently, I had been seeing some really inspiring images on Pinterest, where people had used a kit from Home Depot to add the carriage doors details to a standard garage door. I kept it in the back of my mind, until I saw this pin and knew I had found what I wanted to do.

When I told David my plan to paint faux windows on the garage door, I could tell he was skeptical of how it would look. I ignored him and went to Home Depot to pick up the hardware. Because our door is so massive, I knew I would have to get two sets. I feared only having one set wouldn't have the impact I wanted. At $20 a piece, it wasn't exactly cheap, but I knew the effect would be worth it.


The first step in installing the hardware is much easier if you have a second person. One person can hold up each piece while the other stands back to make sure it looks level and even. Using a level in this case won't work since the pieces aren't straight across. If you don't have another person around, you could always tape up the pieces to hold them in place. 


Once I found my positioning, I marked where the screws would go and drilled pilot holes, then screwed each piece into place.


This part took me about an hour or so and was quite straightforward. Then, it was on to phase two: making the faux windows.


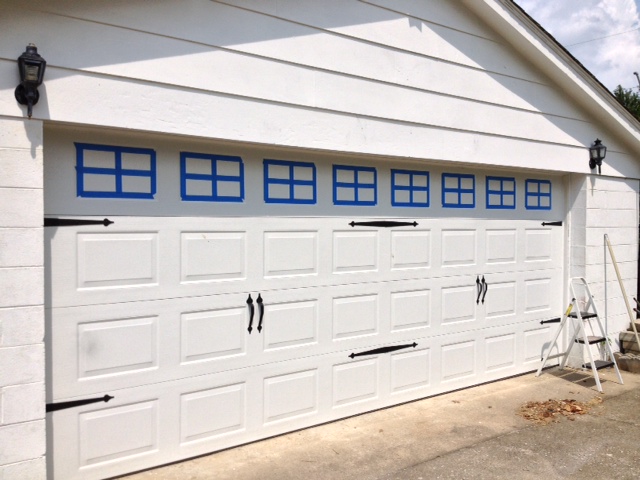
I measured each top panel, then made marks where my painter's tape edge needed to be. I found this by dividing the length or width by 2 (to the find the center point) and then subtracting 3/4" (half the width of my tape). I also outlined the edges of the raised panel with tape.

Then I applied two coats of Valspar's Black Magic in an exterior satin finish. This is paint that I had leftover from previous projects.


I peeled the tape off and was sorely disappointed. Because of the texture of the door, paint had seeped under my tape. To remedy this, I took a small artists paintbrush and some white paint and touched up around each square. It ended up not being nearly as time consuming as I had feared.

It still wasn't perfect, but definitely much improved. From a small distance, it's not noticeable.


And that was that! We would love to one day cover the painted cinder blocks with a nice taupe vinyl siding to spruce things up even further.


What have you been fancify-ing recently?