That is the bathroom closet I have lived with for the past 3 years.
Fake brick wallpapered shelves and all. Ripping it all out and replacing it with new shelves has been on my list for quite some time, and I finally got around to doing it this week.
Before I started on the shelving, however, there was a giant hole to contend with.
When David replaced the water lines with a PEX system a few months ago he had to cut a hole in the wall of the closet to access the shower lines there. We purchased an access panel to avoid having to do that again, but some patch work needed to be done. I did this in the same way as in the guest room.
Much better.
Then I could get to clearing everything out. You can really see the delicious adhesive vinyl in this picture. Mmmm...
Which meant the bathroom looked like this.
Then I got my trusty hammer and ripped all those bad boys out. It was extremely satisfying.
When I pulled out one of the upper shelves, these counter top samples fell. The one the left is "pearl" and the one on the right is "ray gray." Apparently they've been there since David moved in 4 years ago and no one ever saw them because they were on such a high shelf.
Once everything was out, much spackling was needed.
Followed by a fresh coat of paint. I decided to use the same color as is in the rest of the bathroom. So much better already!
Next I measured and cut 1x2" boards to act as my shelf supports, then painted them in a white semi-gloss to match the rest of the trim in the house. I only painted two sides (the front and bottom) because the other sides would not be visible. My shelves would be L shaped so I needed supports for all 4 walls.
Then I used a finish nailer and a level to attach them to the wall. This is when the nail gun got jammed and David had to spend an hour completely disassembling it. Thus concluded my first day's work.
Three days later, which was the next time I was able to do any work on the closet, I finished hanging the supports.
I realized that the ends of wood are visible, so I had to go back and paint those once they were on the wall. I also spackled the nail holes.
I hunted around Ikea last time I was there to find an economical solution for the shelving and came up empty handed until I was browsing through the As-Is section and found white 30" x 10" shelves in bundles of 5 for $3. Yes, five shelf pieces for $3. I did some quick (or not so quick) math and then happily took two bundles home.
I measured and cut them all and then stuck them on the supports to make sure they fit. Turns out, they didn't because the wall has a big lump in it. I re-measured and re-cut and was back on track again.
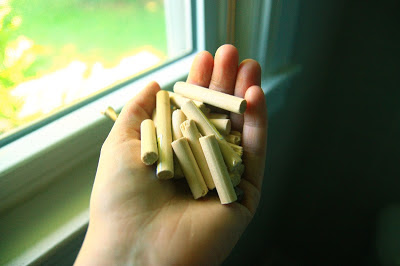
My initial plan to join the shelves involved cutting a dowel rod into small pieces.
Then drilling holes in the ends of two boards to be joined and using the dowels to connect them.
That plan did not work. Despite using a couple different methods to line up the holes (toothpaste, holding them together and making a mark) the boards never lined up quite right and didn't support much weight without bowing.
So that plan was abandoned and I went to Lowe's and got these metal brackets instead. I placed them on the bottom of the lower two shelves, and the top of the upper two shelves so they would not be visible unless you were floating by the ceiling or sitting on the floor. While installing these, I learned that the material my shelves were made of is not easy to drill into. I got 6 of them done before I was on the verge of throwing the drill through the window and/or sitting in the closet floor crying so I let David take over while I moodily browsed Pinterest.
Once that was done, I caulked the seams where the different pieces of shelving met each other, then all that was left was putting it all back.
I got some white metal bins at Garden Ridge for $5 a piece to help organize the mess in an attractive way. I wanted to add a chalkboard label to the front so I made some chalkboard paint using this method. Then I used contact paper to make a stencil and painted it on.
You can't see the stencil because it's the same color as the bin, but I promise it's there.
When I wrote on it with chalk after it dried, the chalk pulled the paint off the metal instead of writing on it, so it didn't really work, but the result was still (somewhat) the same, so for now I am keeping it as is.
And that was that!
I am so thrilled with it. I may or may not start smiling like a crazy person when I open the door now.
And the best part? Thanks to my awesome shelving find, the entire project cost under $30!


Love it! It's so clean and fresh! Glad to see Lowe's power outage didn't get you down :)
ReplyDeleteI want to come over sometime and see your place since you've been doing all this. I haven't been over in a while.
ReplyDeleteI think your initial idea for using dowels to join the shelves was a good one. The best way to drill the holes is with a doweling jig, which I have and you can borrow the next time you attempt something like that.
ReplyDeleteA doweling jig you say. I think you have everything.
Delete