

When I first laid eyes on this bad boy at the Goodwill, I immediately knew what I wanted to do with it. I snapped this picture and sent it to Cait (from My Old Kentucky House) to make sure I wasn't crazy. She liked the idea as well, so I grabbed it up and took it home for $8.50.

The thing was pretty wobbly and ugly.
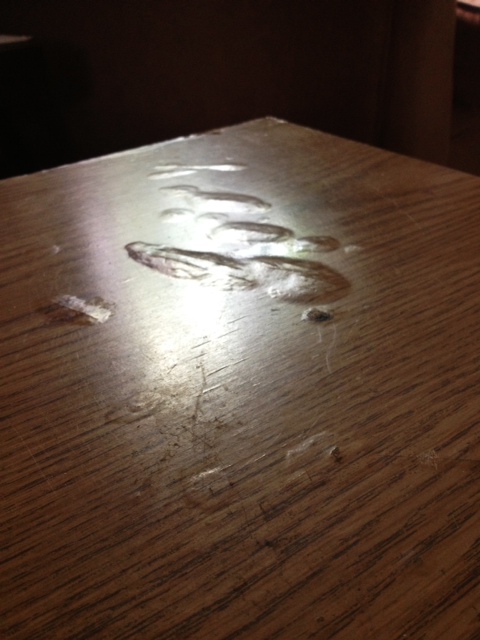
The surface of the table top had definitely seen better days, but that didn't matter for my project. I was going to make it into a padded bench!

I started out by unscrewing the table top from the base, and then tightening the bolts that held the legs to the base. That solved all the wobbly issues.
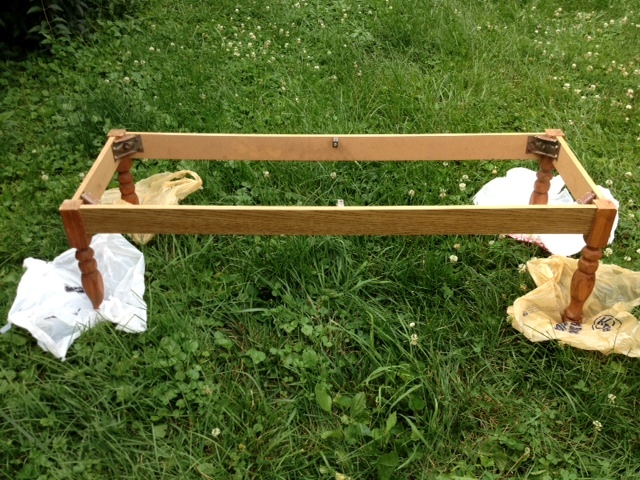
Then I took it outside, gave it a quick sanding and spray painted it a nice glossy white. Thunder was rumbling, so I had to make this step a quick one.

Fortunately, the storm held off until I was done.

While the base was drying more thoroughly under the cover of the carport, I flipped over my detached table top and marked locations for 6 evenly spaced holes, then drilled straight though. These would be used later for tufting the cushion.

I purchased three 2" thick foam cushions because it was MUCH less expensive than buying one long piece. Also, these 18" squares were exactly the same width as my table. Score.

The table was not as long as the three foam pieces, however, so I marked and cut off the excess of the last piece with scissors. I used spray adhesive to attach the foam to the top of the table.
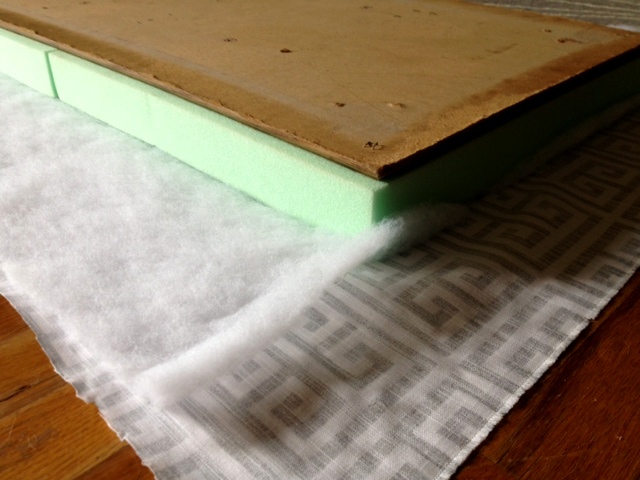
I laid out my fabric and batting, wrong side up and flipped my table and foam over on top of it.

After doing some adjusting to ensure the pattern was straight in relation to the top, I cut off the excess fabric.

I pulled the fabric nice and tight, folded the raw edge under and shot in a few staples on each side. Once everything was secure, I turned it over to make sure the pattern was indeed straight and that my fabric was nice and tight.

After ensuring everything was hunky dory, I flipped the table upside down again and put in staples every few inches, pulling the fabric tight as I went.

For the corners, I just folded them like I would if I were wrapping a present.

I intentionally left enough excess fabric so that the stapled edge would be inside the edges of the table base. This way, it would not be visible, unless you were laying directly under the bench. This did mean that the holes for reattaching the base were covered, so I made sure to mark where they were as I stapled.

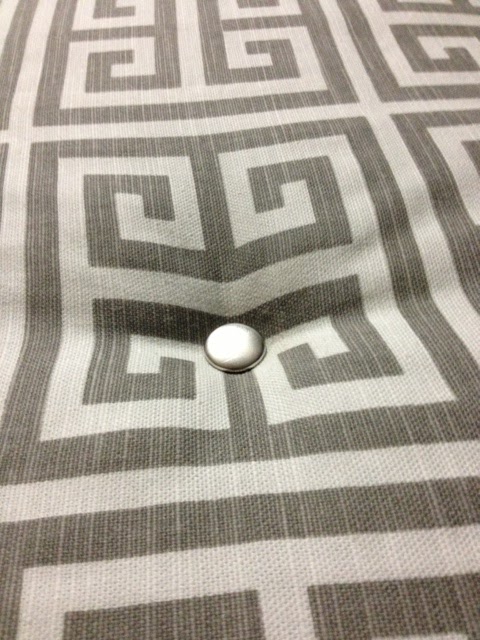
Nice and smooth! Now comes the part where, I admit, I had no idea what I was doing. I had a basic idea of how tufting worked and I watched a YouTube video of someone doing it. It didn't make it any easier that I had no needles that were long enough to fit all the way through the cushion.


Once I got the thread pulled through, I rolled up an extra piece of batting and placed it over top the hole. Then I pulled my thread tight and tied a single knot around the batting. Flipping the table over, I made sure the tuft was as deep as I wanted and of a similar depth as the others.

Then I tied two more knots so it was nice and secure and trimmed off the excess thread.
Ta da! It was actually working!

Repeat six times, or however many tufts you want in your cushion.

Then it was just a matter of reattaching the base. You can see here what I meant by not being able to see the stapled edge of the fabric. I lined up the holes on the hardware with the previously marked spots on my fabric and screwed everything back the same way I took it out.

I'm quite pleased with the final result.

I'm not sure where it will finally end up, perhaps in the basement, when it is finished.

Wonderful!
ReplyDeleteMy only Question why didn't you get the Air Hockey table!
ReplyDelete