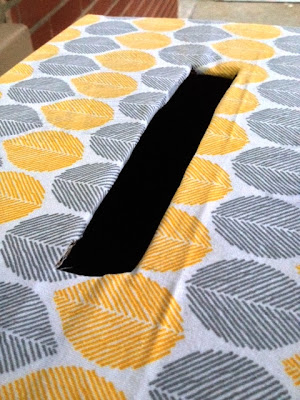
The first thing I made was a card box. One of those practical things you need to have that is easy to forget about. I didn't want to spend much time or money on this item, so for the most part, I worked with what I had.
I started out with a cardboard box that I got for free at the liquor store. Stay classy, friends. I also used some extra fabric I had from making curtains in the office. This "fabric" is actually two twin sheet sets. I used the flat sheets for the curtains so I still had both pillow cases and fitted sheets left.
The first thing you want to do is tape your box shut. Then use an exacto knife (or box cutter) to cut an opening in the top that will be the opening people drop their cards into.
For this project, I cut up one of the pillow cases so I was working with a flat piece of fabric. Then, I sprayed my box with spray adhesive and smoothed the fabric over the top of it.
Then, I used an exacto knife to cut through the fabric that covered the opening. I used a glue gun again to fold the edges under and hold them in place for a clean edge.
I found a cute slate sign at Michaels, which I hot glued to the front of the box and used chalk to write "cards" on it.
And that was it!
Next up was a chalkboard sign outlining mine and David's "love story" or the series of major events that lead up to the big day.
I started out with an ugly old frame that I found at the Goodwill for $3.50. I removed the staples holding everything together at the back and took apart all the pieces. I gave the glass a good cleaning, painted the frame with a sample pot I had already, then painted right over the art with chalkboard paint that I mixed up.
Looking much better already! I started free-handing my words and was happy with my heading, but the dates and events just weren't coming out the way I wanted. At Cait's suggestion, I designed my text on the computer, printed it out, the covered then back of the paper with chalk. I held the paper on my chalkboard surface and traced over the letters with a pen. This provided a faint outline for me trace with the chalk.
This method provided a much cleaner look that I was much happier with! I then reassembled everything, using duct tape to hold everything together, in place of the staples that were originally there. Not the most secure thing in the world, but it will hold well enough for its purpose.
I worked on both these projects sporadically over a few days, but if you were ready to get down to business, each could be completed in about an hour.
I'm sure I'll have more projects to share as the day gets closer and closer!


No comments:
Post a Comment